Hacks for a Clutter-Free, Pinterest-Worthy Kitchen
Hi there – I’m excited to share my pantry organization journey with you! Not long ago, my pantry was a mess. I’d buy cereal and later find two unopened boxes hiding in the back. Making dinner often felt like a scavenger hunt. If that sounds familiar, you’re in the right place. A well-organized pantry saves time, keeps the kitchen tidy, and inspires me to cook more. In this post, I’ll share my best pantry organization tips. We’ll cover deep pantry design ideas, ADHD-friendly hacks, and small pantry challenges. I’ll show how to set up snack zones and create organized shelves with jars and baskets. I’ll also add pantry decor ideas and show how organizing ties into overall kitchen organization. Let’s make your pantry a favorite space!
As an Amazon Associate, I earn from qualifying purchases. This website is a participant in the Amazon Services LLC Associates Program, an affiliate advertising program designed to provide a means for sites to earn advertising fees by advertising and linking to Amazon.com and other affiliate links
Why Organizing Your Pantry Matters 🤔
Before we get into the how-tos, let’s talk about why pantry organization is worth it. Trust me, once I got my pantry in shape, I noticed huge benefits:
- Saves Money & Reduces Waste: An organized pantry makes it easy to see what you already have. You won’t accidentally buy a third bottle of olive oil. Up to 31–40% of the American food supply is wasted each year, worth about $161.6 billion. Much of that waste happens because we forget what we own and let food expire. When everything is visible and categorized, avoiding expired items or cluttered chaos becomes much easier.
- Saves Time & Stress: No more frantically searching for the salt while the pasta boils over. With a proper system, I can immediately lay my hands on any ingredient. This not only speeds up meal prep but also lowers my stress. Clutter has been linked to higher cortisol (stress hormone) levels, especially in women. Coming home to an orderly pantry gives a little sense of calm and control in an otherwise busy day.
- Maximizes Space: Organization is like adding square footage to your pantry. I was amazed at how much more usable space I had after decluttering and rearranging. An organized pantry also keeps your countertops clear, making the whole kitchen feel more open and clean.
- Prevents Pests & Stale Food: Have you ever had pantry moths or weevils invade an open bag of flour? Transfer dry goods to airtight containers and use clips on bags, so everything is sealed. An organized, sealed pantry keeps the bugs away by reducing tempting open packages. It also means food stays fresh longer – no more stale crackers because someone left the box half-open. As a bonus, labeling containers with dates helps me keep track of expiration dates so nothing sneaks past its prime.
- Inspires More Home Cooking: This was an unexpected perk – when my pantry is tidy, I feel excited to cook. It’s like walking into a mini specialty store in my own home. All my ingredients are easily visible and accessible, which inspires me to try new recipes. (It’s hard to feel creative when you’re staring at a jumbled mess.) An organized pantry and kitchen are the foundation for smoother meal planning and cooking. When you know exactly what you have, you can prepare meals without stress.
In short, pantry organization isn’t just about aesthetics – it’s about making your life easier. Next, let’s get into the fun part: how to actually do it!
Deep Pantry Design Ideas 🗃️
Do you have a pantry that’s essentially a deep, dark cave where items go to disappear? Deep shelves can be a challenge – things get shoved to the back and forgotten. But don’t worry, I’ve got deep pantry design ideas to help you maximize a deep pantry or closet design so nothing gets lost. Here’s what worked for me:
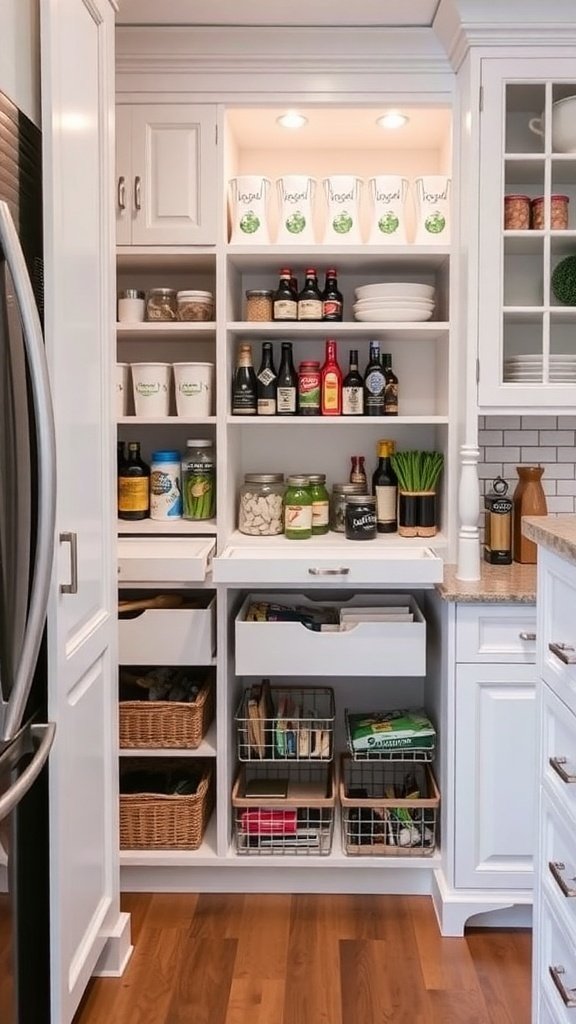
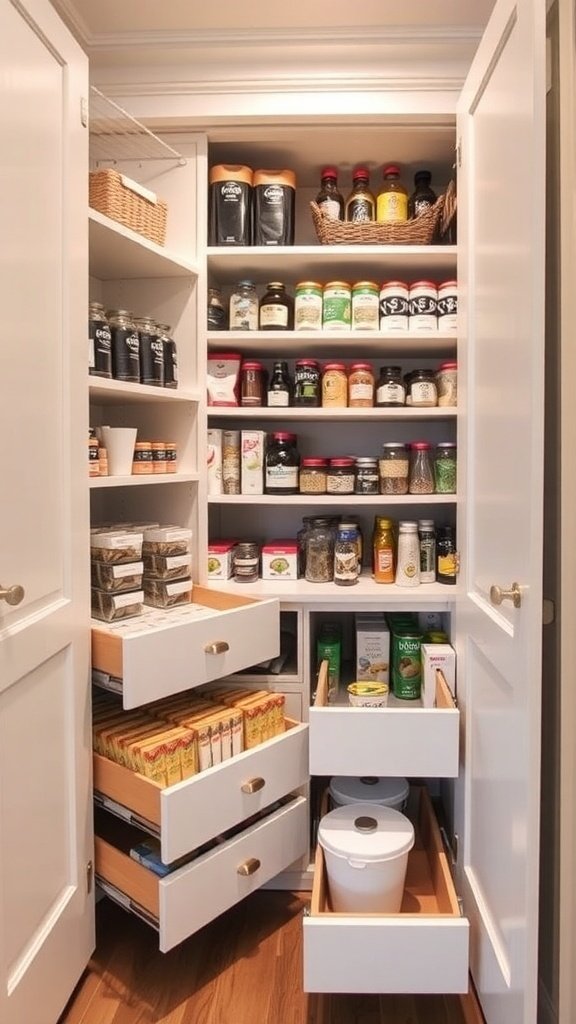
- Pull-Out Drawers or Bins: Adding pull-out shelf drawers transformed my deep pantry. I no longer contort my arm to reach the back. Now, I slide out the drawer and see everything instantly. If drawers are too expensive, use large bins as makeshift pull-outs. Fill bins with similar items and position them on shelves. I keep baking supplies in a bin at the back of a deep shelf. When needed, I grab the handle and pull it forward. Lazy Susans are also lifesavers for deep corners or awkward spots. A quick spin brings hidden items right into view.
- Adjust Shelves (if possible): If you can modify your pantry, avoid one super-tall stack of deep shelves. Consider a U-shaped pantry design with shallow shelves on the sides and deeper shelves in the center. Smaller items stay visible on shallow shelves, while bulkier items like cereal or paper towels fit in the deep section. Ensure shelf spacing isn’t too far apart or you’ll waste vertical space. I added an extra shelf by adjusting heights, which gave me a whole new level of storage.
- Utilize Vertical Space:Tall Pantry Cabinet? High Ceilings? Stack Up!: The top of a deep pantry is often underused. I use stackable shelf risers to split tall space into two levels for cans and spices. This prevents wasted air above shorter items. One tip I love: avoid hiding items behind each other whenever possible. Tiered risers for cans create a stadium effect, keeping even the back row visible. Store tall items upright, like books on a shelf, so labels are easy to read. Clear canisters for pastas or grains let me store vertically and quickly spot when I’m running low.
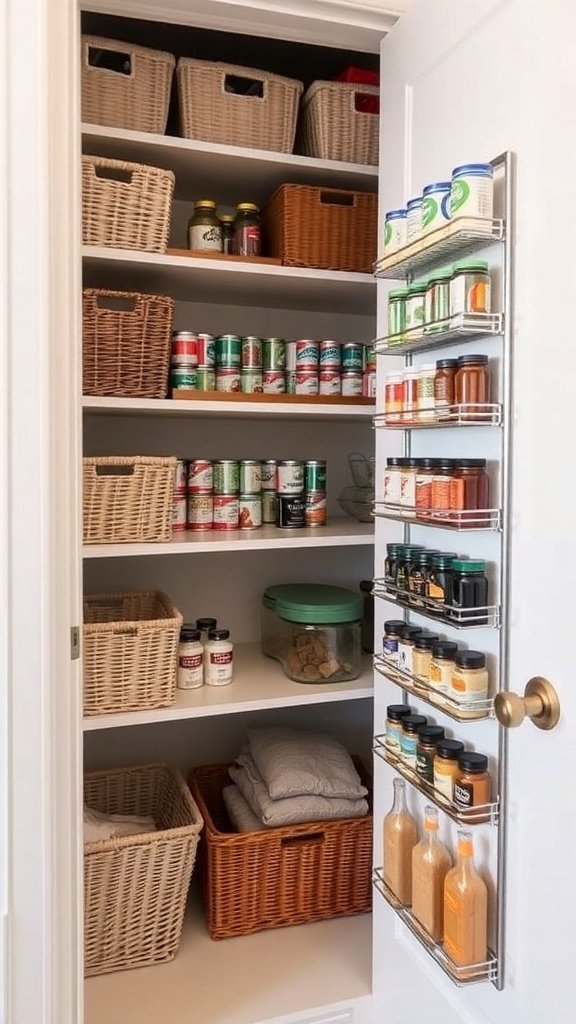
- Good Lighting: Don’t overlook lighting in a deep pantry or closet. Mine used to feel like a dim dungeon. I added a simple motion-sensor LED light, and it completely changed visibility. Now I can see that jar of pasta sauce hiding in the back. A design guide noted, “a pantry needs good lighting… nothing’s worse than squinting to read tiny labels.” Even a stick-on tap light can brighten dark zones where clutter tends to build up.
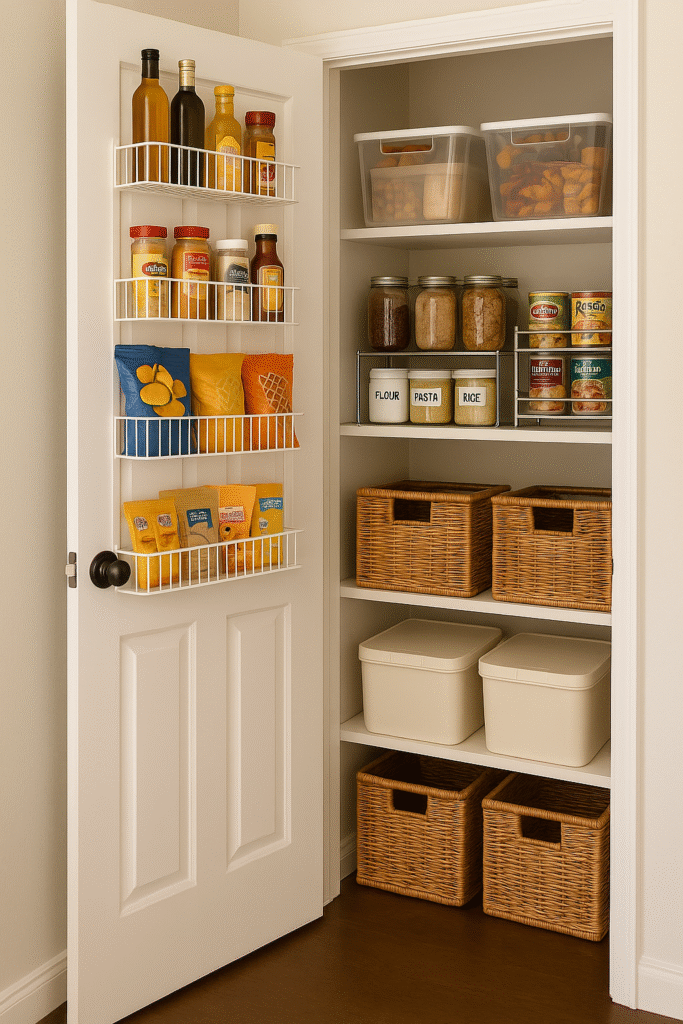
- Back of Door Storage: If you have a closet-style pantry with doors, use that door! I attached an over-the-door rack that holds spices and wraps, instantly adding a few extra “shelves” of space. The door is also a great spot for hanging lighter items like aprons or a grocery list clipboard. Every little nook counts in a deep pantry design. By using the door for smaller items, I free up shelf space and ensure frequently-used stuff (like seasonings or snacks) is front-and-center when I open the pantry.
By implementing these design ideas, my deep pantry went from a black hole to a well-ordered space where nothing gets lost. Remember, the goal is easy access and visibility – when you can see and reach everything without a hassle, you’re far more likely to keep it organized long-term.
Create Zones and Categories (Pantry “Zones” Simplified) 🏷️
Once you’ve got your pantry hardware sorted out, it’s time for the fun part: organizing your pantry into zones. This step was a game-changer for me. Instead of random shelves where anything goes, I now have designated zones for different types of food and kitchen supplies. Think of it like a mini grocery store layout or library system – everything has a category and a “home.” Here’s how I set up my pantry zones:
- Group Similar Items Together: Start by taking everything out of your pantry (yes, a full empty-out!). Then sort items by category on your counter or floor. Common categories (zones) that work for many kitchens include: Snacks, Breakfast Foods, Baking Supplies, Canned Goods, Pasta & Grains, Spices & Seasonings, Condiments & Sauces, Beverages, and Paper Goods or backstock. Your categories might differ based on what you use – for example, I have a “Kids’ Snacks” zone at kid-eye-level so my little ones can grab their granola bars and fruit snacks easily, and a “Tea & Coffee” zone for our hot drink fixings. Identify what categories make sense for your household. Once I did this, I discovered I had like 5 half-used bags of almonds scattered around – now they all live in one “nuts & seeds” basket.
- Assign Zones to Pantry Areas: Now, map those categories to specific shelves or sections. I like to keep everyday staples on the most accessible shelf (about eye level). Less-used items (like holiday baking stuff or bulk extras) go up high or down low. For example, the snack zone is front-and-center because it’s accessed multiple times a day, whereas the baking zone can be up a bit higher since I only bake on weekends. This way, each shelf has a purpose: one shelf might be the “school lunch and snack zone” with baskets of crackers and juice boxes, another shelf is the “dinner prep zone” with pasta, rice, and canned tomatoes, etc. Creating these pantry zones keeps everything logical. Even my family has no excuse now – I can say “it goes in the breakfast section” and everyone knows where that is.
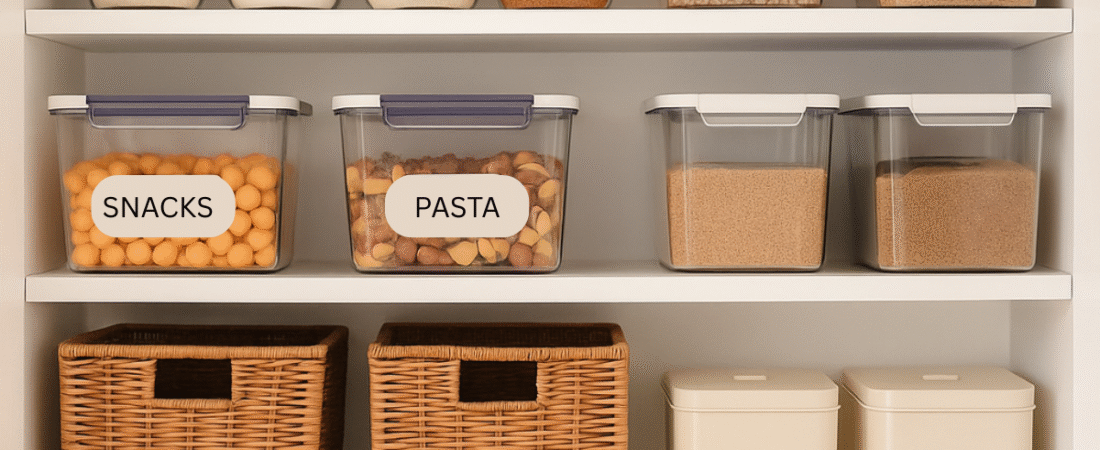
- Use Bins and Baskets to Contain Zones: Bins and baskets are my secret weapon for keeping pantry zones organized. Instead of items scattered across a shelf, I use open bins to group like items – packets of oatmeal or seasoning mixes stand upright in one basket, chips in another, and bread or grab-and-go snacks in their own. This makes grocery restocks so simple: I just pull out a basket, refill it, and slide it back. “Using bins and baskets to give everything a home” is a trend I love because it truly makes upkeep easier – everything has a place to return to. Clear bins are my favorite for visibility; I can instantly see what’s inside and notice when stocks are low. I even use them to create sub-categories inside larger zones, especially in deep drawers or shelves, so nothing gets lost in the shuffle.
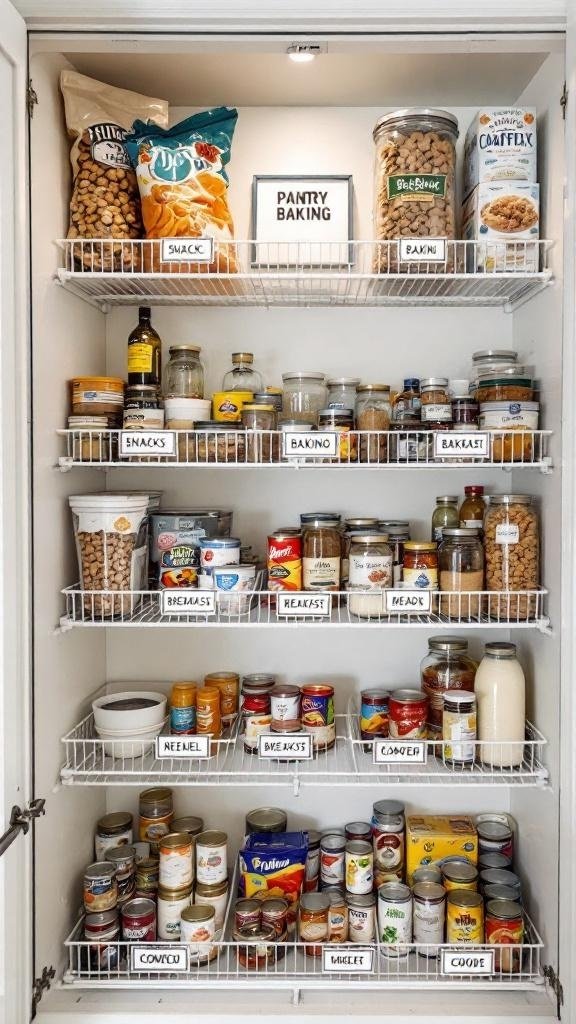
- Label Everything: It might seem a little Type-A, but labeling my pantry zones and containers was the finishing touch that changed everything. I use a simple label maker to mark shelves and bins (like “Snacks,” “Pasta & Rice,” or “Baking”). Now everyone in my house – even my husband and kids – knows where things go. No more “Mom, where’s the cereal?!” because the shelf literally says “Cereal & Breakfast.” Labels act like signposts, gently reminding everyone to return items to the right spot. If you want something prettier, chalkboard labels or script labels work beautifully on jars. The key is making it obvious where each item belongs. Naming spaces is a pro tip I love: as organizing expert Susan Pinsky says, assigning everything a name or place helps keep items together and avoids randomness. So embrace your inner Pinterest DIYer and label away!
- Stay Flexible: While I love having pantry zones, I’ve learned not to stress about perfect categorization. Real life rarely fits into neat buckets, and that’s okay. If I bring home a new snack that doesn’t have a clear spot, I simply place it in the closest-fitting zone. Organization should serve you – not the other way around. I’ve embraced flexibility: when I overstock on chips and they overflow the “Snack” basket, I use an overflow bin on a lower shelf until things even out. As one organizer wisely put it, “Pantry perfection is overrated – the goal is a system that works, not one that just looks Instagram-perfect.” So if that extra jar of peanut butter ends up in the “Breakfast” zone instead of “Condiments” for a bit, no worries. Zones are there to make life easier, and over time you’ll naturally adjust the system to fit your routine.
By grouping items into zones and labeling them, my pantry went from a free-for-all to an organized grocery store shelf. 🎉 Maintaining it is so much simpler now because everything has a place. And an unexpected bonus: when I’m making my grocery list, I can quickly scan each zone and see what’s running low (no more surprise empty peanut butter jar hiding behind five others). Next up, I want to share some specialized tips that have helped me – especially if you or your family members have ADHD or struggle with staying organized.
ADHD Pantry Organization Hacks 🧠
As someone who occasionally struggles with staying focused (hello, endless scrolling on my phone when I should be cleaning 🙋♀️), I’ve looked into ADHD-friendly organization hacks for the pantry. Whether you have ADHD or just a “busy brain,” these tips are all about making it easy to maintain your pantry with minimal effort. The truth is, the easier and more automatic your system, the more likely you (and your family) will stick to it. Here’s how I set up my pantry to be ADHD-friendly (and kid-friendly, and spouse-friendly… easy for anyone):
- Keep It Simple; Less is More: The number one rule for an ADHD-friendly pantry is reduce the inventory. The more stuff jammed in there, the more overwhelming it feels. I did a ruthless purge and donated or tossed anything we didn’t use or that was expired. Now I try not to “overstock” too much – it’s tempting to buy in bulk, but having 20 extra cans of soup can create clutter that’s hard to manage. If you have ADHD, too much variety or excess can lead to paralysis when trying to find things. So streamline what you keep. It’s okay to have some backup, but maybe not five backup ketchups. 😉 As one organizer (who has ADHD herself) advises, try not to do too much stocking up – more stuff = harder to stay on top of it.
- No Complicated Systems: Those gorgeous Pinterest pantries with perfectly decanted snacks and matching jars look amazing, but I know myself – I won’t transfer every box of crackers into a jar forever. If it feels high-maintenance, skip it. I learned this lesson the hard way after spending a weekend decanting spices into cute jars, only to stop refilling them a month later. For an ADHD-friendly approach, I keep things simple: broad categories and easy toss-in bins. Instead of separate containers for crackers, pretzels, and popcorn, I have one bin labeled “Salty Snacks.” We toss everything in there, and it works because it’s easy to maintain. It might not look as picture-perfect as identical jars, but function over form is key when attention is limited. Even organizing experts warn that overly fussy systems can backfire if you can’t keep up – so keep it simple and sustainable.
- Use Clear, Visible Storage: Out of sight is out of mind, particularly for ADHD brains. I make heavy use of clear containers and open baskets so I can see what’s inside without any extra step. Clear plastic bins are MVPs – I can see the snack bags or pasta packages immediately. For things like cereal, nuts, or baking ingredients, I use clear airtight canisters only for the stuff I use frequently. The clarity provides a visual cue that’s hard to ignore, which means I’m less likely to forget about an item. Also, consider removing excess packaging: I always take granola bars out of the box and put them in a bin, so an empty box doesn’t fool me into thinking I still have snacks. Simplify packaging = fewer distractions.
- Label in Plain English: We touched on labeling earlier, but it’s worth repeating – clear labels make a huge difference. I label shelves and bins in a way that makes sense to me. If your brain prefers broad categories, label broadly – think “Dinner Ingredients” instead of overcomplicating things. The goal is that, even when I’m tired or in a rush, my pantry “talks” to me through those labels. For example, I have a bin simply marked “Easy Meals” with mac & cheese, ramen, and other quick fixes. On busy nights, I go straight to that bin. Labeling also helps my family maintain order; they see the label and (fingers crossed) put things back where they belong. A book I read suggested naming spaces like “Snack Shelf” or “Coffee Station.” It sounds simple, but those names create a mental map that makes keeping the pantry organized second nature.
- Set Up a “Quick Win” Layout: For individuals with ADHD, starting a task is often the most challenging part. So arrange your pantry so it’s almost self-maintaining. Store items where you use them to reduce steps (coffee supplies by the coffee maker, lunch prep items together). Keep everyday items at eye level or in grab-and-go baskets. I even have a basket labeled “Today’s Dinner” where I’ll gather non-perishables for the meal I plan to cook that night – a trick that helps me focus on just what I need now, and it empties by dinner (built-in daily reset!). If you struggle with overwhelm when organizing, break it into small chunks: organize one shelf at a time, not the whole pantry at once. I often set a 10-minute timer and just tackle a mini-area; it keeps me from burning out.
- Make Maintenance Foolproof: I’ve learned to design my pantry so that even on my laziest days, I still put things back where they belong. For me, that means avoiding lids on everyday containers – open bins are easier for snacks or grab-and-go foods. I also keep a donation bin nearby for items we don’t like; instead of shoving them back, I toss them there to clear space. One of my favorite hacks is a whiteboard on the inside of the pantry door. When I notice something running low, I jot it down, then snap a photo before heading to the store – no forgotten grocery lists! These little aids are ADHD-friendly and keep the pantry low-maintenance. I also do a quick 5-minute tidy once a month to check for expired or misplaced items. Small resets like this prevent the chaos from building up and keep the pantry easy to manage.
The theme of these hacks is “make it so easy you can’t NOT do it.” Since revamping my pantry with these principles, I’ve found it practically takes care of itself. Even on chaotic days, things end up roughly where they should, because I’ve removed the barriers (physical and mental) that used to make pantry upkeep such a drag. If you have ADHD or just struggle with clutter, try incorporating some of these ideas – your future self will thank you! 🙌
Small Pantry Organization Tips 📏
Not everyone has a giant walk-in pantry (I sure don’t!). In fact, my first apartment had no pantry at all – just a single cabinet for all our food. Whether you’re working with a small pantry closet, a single cabinet, or just a shelf, you can still stay organized and make the most of that space. Small pantry organization is all about clever use of every inch. Here are my top tips for squeezing maximum functionality out of a small space:
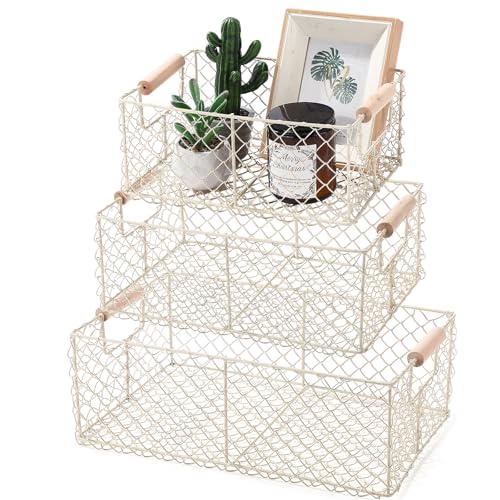
- Use Every Inch of Vertical Space: In a small pantry or cabinet, shelf space is prime real estate – so don’t let the vertical space above items go to waste. I love using undershelf baskets that hook onto an existing shelf, creating an extra mini-shelf underneath. They’re awesome for storing things like wraps, foil, or even snacks. Stack items whenever possible: I stack cans on a tiered shelf, and I nest smaller jars on top of larger jars if there’s headroom. You can also use cabinet shelf risers to double-stack shorter items (picture a rack that lets you put spice jars on top and below). As HGTV organizers say, “max out your vertical storage” by adding these extra layers. In my tiny pantry, I even placed a tension rod up high to hang lightweight items (like chip bags clipped with shower hooks)! Get creative with the vertical dimension.
- Door and Wall = Bonus Storage: For a small pantry closet, the door is your best friend. Add a slim over-the-door organizer or even stick Command hooks inside the door for things like measuring cups or grocery bags. If you don’t have a door (say it’s just a bookshelf or open cabinet), consider mounting a pegboard or a few small shelves on a nearby wall to hold spices or utensils. In one apartment, I literally turned a bookshelf into a pantry, and I hung a fabric shoe organizer on the side of it to hold snacks and seasoning packets – not the fanciest look, but it worked wonders for storage. The key is to treat any flat surface as potential storage in a tiny kitchen.
- Prioritize and Purge Regularly: Let’s face it, a small pantry can only hold so much. Be selective about what earns a spot there. I keep only our day-to-day essentials in the pantry cabinet; bulk overflow (like that 10-pack of paper towels or the giant sack of rice) lives in a closet in the hallway. It’s fine if not everything is in your main pantry as long as frequently used items are. Also, make a habit of doing a quick purge often – in tight quarters, one or two stray items can make the whole space feel cluttered. I do a “mini clean-out” every couple of weeks: tossing stale chips, combining two half-empty cereal boxes, etc. It takes 5 minutes and prevents build-up. Think of it like weeding a small garden patch – small space gets messy faster, but a quick tidy keeps it flourishing.
- Right-Size Your Containers: In a small pantry, every inch matters, so I ensure my containers fit perfectly. I measure the shelf width, depth, and height, then choose bins or baskets that maximize storage without leaving any bins or baskets that maximize storage without wasted gaps. Narrow bins matching cabinet depth are lifesavers, and I prefer square or rectangular containers for efficient space use. Stackable containers are another favorite; I store three types of cereal in one neat footprint while still pouring easily. In a small pantry design, every centimeter counts! I also think about style: wicker baskets or clear glass jars double as pantry decor in open pantries. Functional doesn’t have to be boring – the right containers keep the pantry practical and visually inviting.
- Make It Accessible: When space is tight, things can get buried behind each other quickly. I prevent “lost” items by using slide-out solutions. For example, a slim rolling cart can fit beside a fridge or in a narrow gap and serve as a pull-out pantry for cans and jars. If you have deep lower cabinets, use pull-out wire baskets so you can see the back row. Place most-used items in front or at eye level. In my tiny pantry shelf, I keep snacks and staples in front; niche ingredients like that jar of artichokes stay in the back or up high. Another trick: use smaller containers to group loose packets (drink mixes, sauce packets) so they don’t scatter everywhere. And corral those plastic grocery bags – I stuff mine into a tissue box mounted on the cabinet side, a DIY dispenser that saves space.
The overarching idea is efficiency – a small pantry can be mighty if you employ smart organizing gadgets and are disciplined about what goes in it. With these tips, even a single cabinet can function like Mary Poppins’ bag, holding more than you’d expect and staying tidy. Remember, whether your pantry is a sprawling walk-in or one shelf, the goal is the same: store things in a way that you can easily find and use them. Size doesn’t matter as much as layout and consistency.
Kitchen Snack Organization (My Snack Station) 🍿
If your household is anything like mine, snacks are serious business. Keeping snacks organized was a constant battle – the granola bars would migrate all over, and chip bags took up awkward space. I decided to create a dedicated kitchen snack organization system, and it’s been a total game-changer (especially with kids around). Here’s how I set up my snack zone so that it’s both organized and easy for hungry family members to help themselves:
- Designate a Snack Zone: First, I gave snacks their own “home” in the pantry. Previously, they were wherever they fit, from top shelf to floor. Now, one entire shelf is the Snack Zone, centrally located so everyone can reach it. If you have kids, consider making this a low shelf so even little ones can grab a treat without climbing.. By containing snacks in one area, it’s easy to see our selection at a glance and notice when something’s running low.
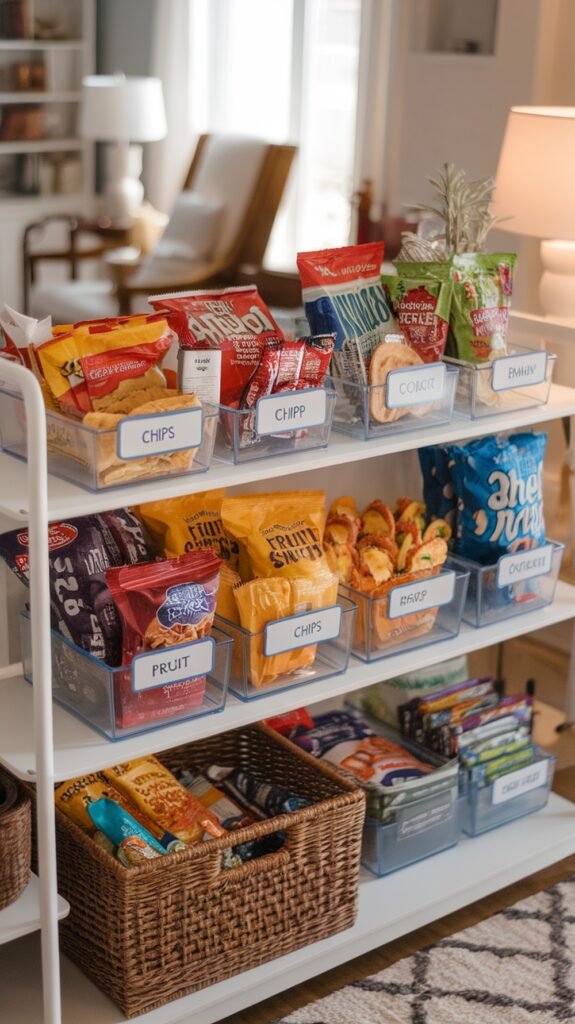
- Use Bins for Categories of Snacks: On my snack shelf, I sort snacks by type using separate bins. One clear bin holds savory snacks like chips, pretzels, and popcorn bags. Another bin keeps sweet snacks such as cookies and fruit snacks. I also keep a bin for healthier options like nuts, granola bars, and dried fruit. If you have kids, consider bins for “school snacks” or “after-school snacks.” Instead of rummaging through random bags, they can pull out the right bin and grab what they need. This also helps with balance; my kids know they can choose one savory and one sweet snack.
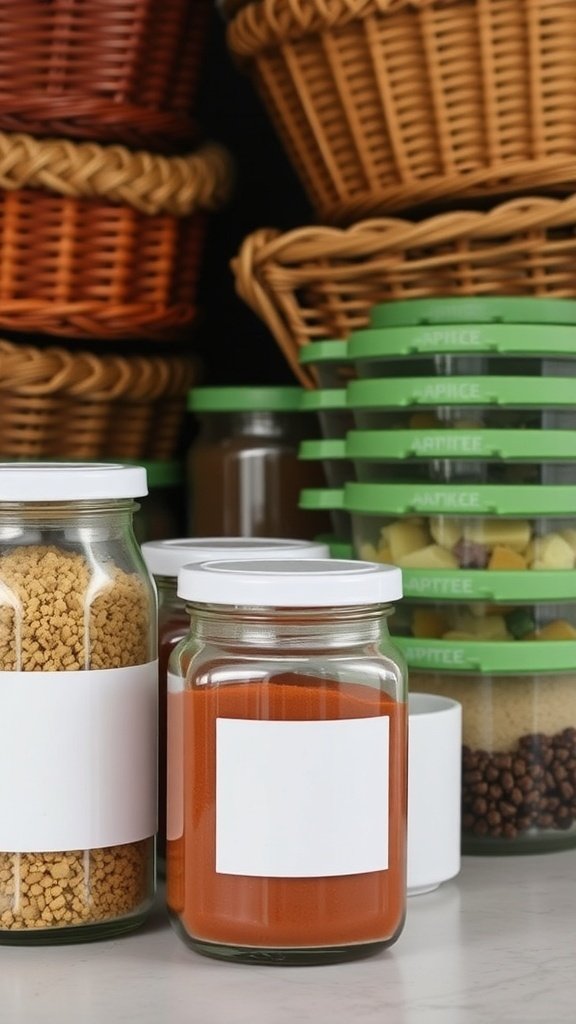
- Portion and Package Smartly: I repackage bulk snacks into smaller portions for better pantry organization. For example, I split a large box of goldfish crackers into smaller reusable containers or zip bags that stack neatly. This makes grab-and-go easier and prevents oversized boxes from hogging space when almost empty. For cookies or crackers, I use clear jars or canisters to keep them fresh and visible. Medium-sized mason jars work perfectly for trail mix or nuts, lining up neatly and looking inviting on the snack shelf.
- Label or Color-Code (Optional): To make snack bins easier, you can label them with names like “Chips & Crackers,” “Sweets,” or “Healthy.” My clear bins are self-explanatory, so I skipped labels in this area. Another fun idea is color-coding bins or sections for each day of the week, especially if kids devour treats quickly. Some parents use this to ration snacks effectively. I personally just keep an eye on what’s left, but having organized bins helps naturally. It’s easy to see when supplies are low and plan accordingly, like saving granola bars for school lunches.
- Accessible = Self-Service: The best part of our organized snack station? The kids can serve themselves (within reason). All the snacks are at their level, and the most “approved” snacks (like fruit cups or granola bars) are front and center. Treats like candy are higher up in the sweet bin so they’re less obvious. This way, when my 5-year-old says she’s hungry between meals, I can just say “check the snack bin” and she can pick something herself.
Organized Pantry Shelves with Jars and Baskets (Looks + Function) 🧺
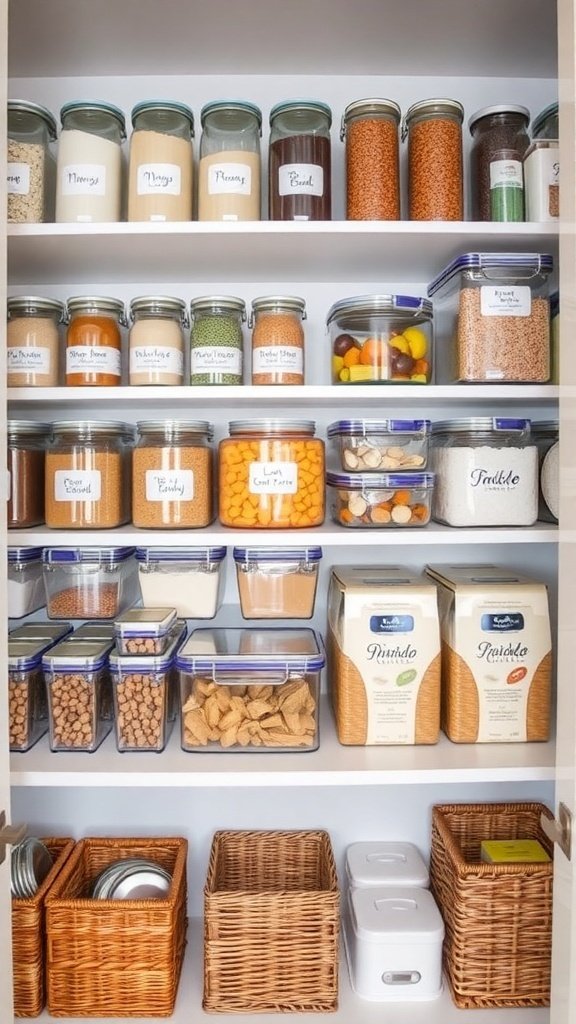
We’ve talked a lot about function, but I know many of us also dream of those picture-perfect pantry shelves – the kind with rows of pretty jars and stylish baskets that you might see on Pinterest or HGTV. The good news is, you can achieve organized pantry shelves with jars and baskets without sacrificing practicality. I personally balanced my desire for a visually appealing pantry with my need for easy maintenance. Here’s how I did it and my tips for pantry decor and styling along the way:
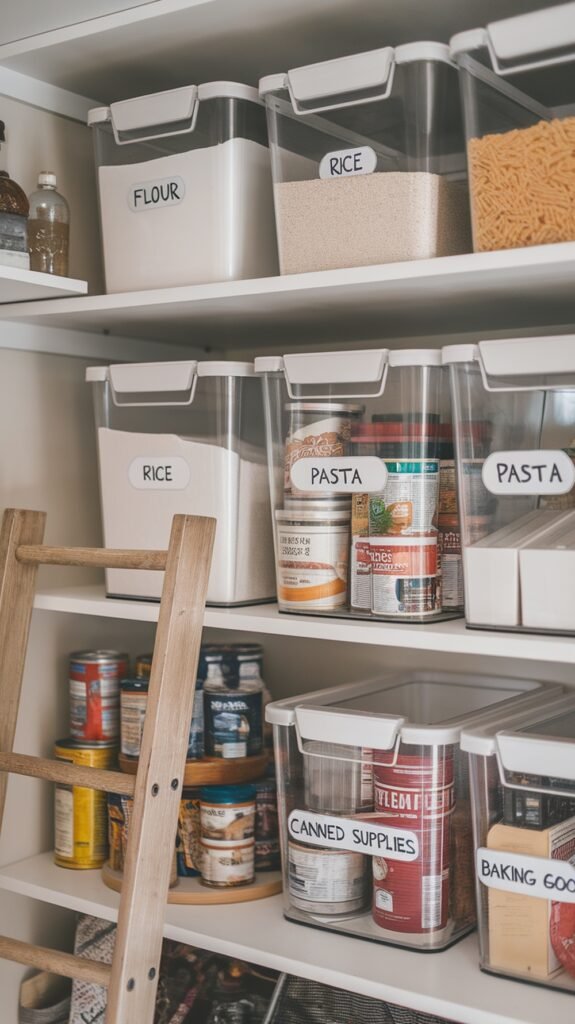
- Decant Strategically into Jars: I love the clean, farmhouse-chic look of glass jars lined with pantry staples – they make everything feel organized and let me see contents easily. But decanting everything is unrealistic, so I follow one rule: only decant what makes sense. I transfer items that need an airtight seal or look messy in their bags, like flour, sugar, rice, pasta, and snacks such as nuts or cookies. Nice airtight jars keep them fresh and uniform. Items we use quickly or that have instructions on the box, like pancake mix, stay in their packaging, though I’ll often place those boxes in baskets to contain clutter. The goal is balance – decant enough to get that magazine-worthy look but avoid creating a high-maintenance system. For example, I leave spaghetti in its box since we use it often, and the box fits fine – no need to overcomplicate.
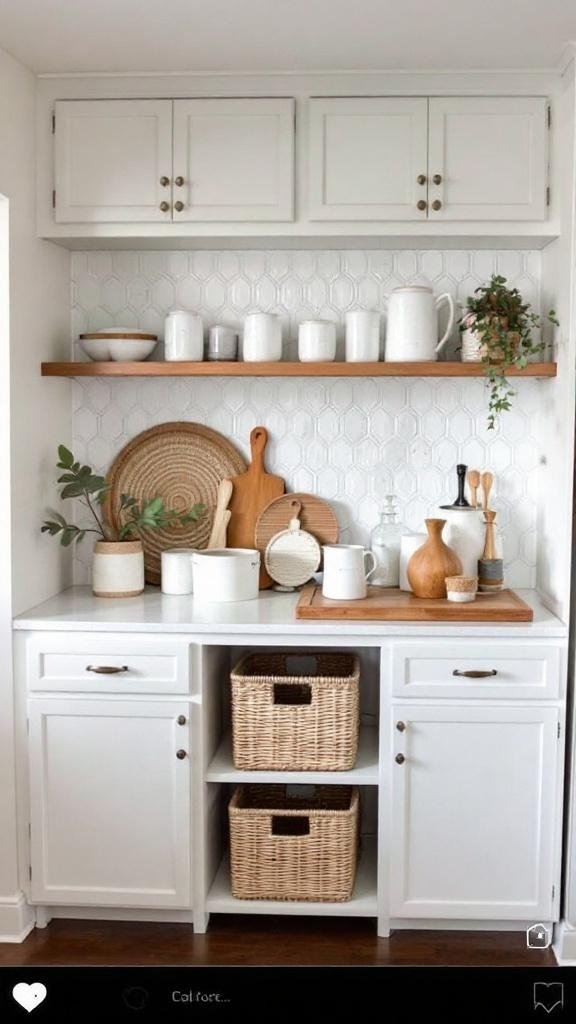
- Mix & Match Baskets for Texture: Baskets are one of my favorite tools for both function and pantry decor. They keep items grouped while adding warmth and texture to the shelves. I use a set of matching woven baskets on my lower shelves to hide less-pretty packaging, like chip bags or snack packets, and create a cohesive look. On my upper shelves, I mix in wire baskets for a different texture and easy visibility from below. I’m not afraid to combine materials – woven, wire, even canvas – as long as the colors coordinate for a uniform vibe. A simple color scheme, like neutrals or natural wood tones paired with clear jars, instantly elevates the look of an organized pantry. I stick with neutral baskets and let colorful packaging be the pops of color. It’s a system that feels both functional and decorative, perfect for everyday use.
- Add a Touch of Personality: Who says pantry decor isn’t a thing? I added peel-and-stick wallpaper with a subtle pattern to my pantry wall. Every time I open the doors, it makes me smile like a little jewel box. You can also hang a cute sign or chalkboard for notes or kitchen quotes. Some people even display family photos or kids’ artwork inside pantry doors. These small touches make the pantry feel like part of your home’s style instead of just storage. Keep decor minimal so it doesn’t interfere with function. A slim decal or framed print on a blank wall adds charm without losing space.
- Keep Aesthetics Functional: My golden rule for pantry prettifying is that form should follow function. That gorgeous set of matching jars means nothing if it’s a pain to use. So, I made sure every aesthetic choice also had a purpose. Chalkboard labels on jars look cute and let me update the name or expiration date easily. Matching baskets look tidy and make it easier to pull items down. Even the wallpaper I chose is wipeable in case of spills. If you’re investing in containers, choose ones that seal well and are easy to open (some jars look nice but have finicky latches – avoid those if you’re in and out of them daily). Fortunately, many organizational products these days are designed to be both stylish and practical.
- The Payoff – “Shop Your Pantry”: Now when I gaze at my organized pantry shelves with jars and baskets, it honestly feels like I’m browsing a little boutique or well-kept shop. Everything is orderly, and that visual appeal isn’t just for show – it motivates me to keep it that way. It’s strangely satisfying to return items to their pretty baskets and refill my pasta jar when it gets low. My pantry has become a space I enjoy looking at, which means I naturally maintain its tidiness. And if you’re into sharing your home on social media or just with friends, an Insta-worthy pantry is always a bragging point 😉. More importantly, though, it’s a functional space that makes cooking and grocery management easier. For example, when it’s dinner time, I can open the pantry and “shop” from those clear jars and labeled baskets, quickly grabbing what I need without digging.
At the end of the day, don’t feel pressured to make your pantry look like someone else’s on Pinterest. Take inspiration, sure, but tailor it to your style and how you use your kitchen. Even a few pantry decor elements like matching containers or a pop of color can transform a boring pantry into a cheerful, organized haven that reflects you. And if you’re like me, you might find yourself occasionally just opening the pantry door to admire the order – a little happy dance in the kitchen, knowing you’ve conquered the chaos!
Conclusion: From Chaos to Calm – You’ve Got This! 🎉
Organizing my pantry was one of the best investments of time I’ve made in my home. What used to be a source of frustration (and let’s be honest, sometimes science experiments in the back corners) is now a space that brings me calm and joy. Remember, pantry organization isn’t a one-size-fits-all thing – it’s about creating a system that works for you and your household. Whether you implement every tip here or just a few, you’re on your way to a more functional, beautiful pantry that will make daily kitchen life so much easier.
A well-organized pantry also has a ripple effect on your pantry and kitchen organization overall. I found that once my pantry was in order, it inspired me to keep the rest of the kitchen tidier – pots went back in place, the fridge got a declutter, and so on. Organization truly can be contagious (in a good way!).
If you’re feeling a bit overwhelmed about where to start, just pick one section – say, the snack shelf or the spice rack – and start there. Do a little at a time. Progress, not perfection, is what we’re aiming for. And remember those staggering stats: an organized pantry can help reduce food waste and save you money and stress in the long run. You’re not just tidying for looks; you’re creating a system that supports your lifestyle and well-being.
I hope these hacks, design ideas, and tips spark some inspiration for you. Trust me, if I can turn my messy pantry into a manageable, even adorable space, you can too. Take it step by step, have fun with it, and soon you’ll be proudly showing off your pantry makeover to anyone who will listen.
Lastly, if you’re ready to take action, don’t forget to check out some of the tools that helped me the most. Getting the right organizers can make all the difference.
Ready to revamp your pantry? 👇
Explore my favorite pantry organization tools – from the best shelf dividers to the cutest storage baskets – and get started on your pantry transformation!


FAQ: Pantry Organization Questions 🙋
Q: What is the first step to organizing a pantry?
A: Start by taking everything out of your pantry and doing a thorough sort and purge. It might get a bit messy at first, but this step is crucial. Check expiration dates and set aside anything you don’t plan to use. Wipe down the shelves. Once you have a clean slate, categorize your items (e.g., baking, snacks, cans, etc.) before putting things back.
Q: How should I categorize items in my pantry?
A: Categorize in a way that aligns with how you cook and snack. Common categories are: Snacks, Breakfast, Canned Goods, Baking Supplies, Grains/Pasta, Spices, Condiments, Beverages, and so on. Group similar items together – think of creating “pantry zones” like a grocery store has aisles. For example, keep all your baking ingredients in one section or bin so you can pull them out together when baking. Frequently-used categories should be easier to reach (eye-level shelves), while seldom-used ones can go up high. Don’t over-complicate it; broad categories are fine. The goal is to be able to quickly find what you need because all related items are stored together. Once you decide on categories, label the shelves or containers to maintain the system.
Q: How do I keep my pantry organized in the long term?
A: The secret to maintaining an organized pantry is keeping it simple and building habits. I label everything so my family knows where items belong. When I bring home groceries, I immediately decant bulk items or separate them into their zones instead of shoving them in front. Each week, I do a quick inventory before shopping – it naturally straightens things up and prevents duplicates. Every month or two, I do a mini-purge of stale or expired foods, often pairing it with meal planning to use up leftovers. I also follow a first-in, first-out rule: newer items go behind older ones, so nothing gets forgotten. And honestly, life happens – if the pantry gets messy, I don’t stress. I simply reset it when I can. Consistency with small, frequent upkeep beats rare, overwhelming overhauls every single time.
Q: What are the best storage containers for pantry staples?
A: It depends on the item, but in general, airtight containers are my go-to for flour, sugar, rice, cereal, and snacks I want to keep fresh. I love options like mason jars, clamp-lid jars, or OXO-style containers – clear ones are ideal because I can see contents and quantity at a glance. For spices, I use small labeled jars or a spice rack. Heavier items like cans work better on tiered shelves or can risers instead of individual containers. Baskets and bins are great for grouping packets, onions, or snacks. In a small pantry, stackable or modular containers save space. I stick to one or two shapes (like all square) so everything lines up neatly. Choose containers that fit your shelves and habits – if you hate decanting cereal, tall bins for boxes might be smarter.
Q: How can I organize a pantry if I have a really small space or no built-in pantry?
A: Even without a traditional pantry, you can create one.. In my small kitchen, I maximize every cabinet with shelf risers, bins, and door racks. I’ve also used wall-mounted racks, bookshelves, or even baker’s racks in dining areas to serve as extra storage. Some people convert coat closets or part of a basement or garage into pantry space with freestanding shelving – just keep it cool and dry. For super tight kitchens, I love rolling carts act as mobile pantries; they tuck into a corner when not in use. Don’t forget unused spots like cabinet tops or space above the fridge for bulk items. Even the back of a kitchen door can hold a hanging organizer for spices or packets. With grouping, clear containers, and labels, tiny spaces can still function beautifully.
Happy organizing! Enjoy your new clutter-free, efficient pantry. 🎉🍏
Lisa