
Create a Functional and Stylish Workspace
Struggling with a messy desk? You’re not alone. I transformed my cluttered workspace into a productive, stylish haven with simple desk organization tricks – and you can too. Discover how a tidy, functional desk setup can boost your focus, save time, and even brighten your mood.
I used to feel overwhelmed by desk clutter – sticky notes piling up, pens scattered everywhere, and cables dangling in chaos. It felt like my desk was working against me. After one too many mornings spent frantically searching for a missing notebook (did you know people waste an average of 4.3 hours a week looking for papers in clutter?), I decided enough was enough. Once I embraced desk organization, the change was incredible. My workspace went from war zone to zen, and my productivity skyrocketed. I’m not just saying that – a survey found 94% of people feel more productive in a clean workspace. No wonder I can finally blaze through my to-do list! Even my stress levels improved (a messy desk can increase stress for about 31% of folks in one study). Simply put, an organized desk is a game-changer for both your work and your well-being.
In this post, I’ll share how I organize my desk to keep it both functional and visually appealing. These tips cover everything from clever storage solutions and cable management to setting up a student desk in a small space. I’ll even sprinkle in some real-life examples (and a few hard-earned lessons) from my own experience. Let’s dive in!
Desk Organization Tips for a Functional Workspace
1. Clear the Deck (Declutter First)
I start every desk makeover by decluttering ruthlessly. This means taking everything off the desk – yes, everything – and sorting through it. I ask myself, “Do I need this here?” If not, it’s time to toss, file, or find a new home for it. Clearing the deck gives you a clean slate to work with, instantly making the space feel lighter.
- Trash or archive papers: Recycle junk mail, shred outdated documents, and file important papers away. This prevents the dreaded piles of paper from ever forming.
- Remove non-essentials: Items that belong elsewhere (dirty dishes, random gadgets) get put back where they belong. Your desk is not a storage closet!
- Keep everyday tools handy: Keep it simple with this desk essentials starter set – pens, notebooks, and an organizer tray that keep your workspace clutter-free.
Think of this decluttering like spring cleaning for your workspace. Just as a chef clears the kitchen counter before cooking, I clear my desk before I organize. When I did this, I was amazed at how much junk had been crowding my space. After a good purge, you’ll be left with only the essential items – the perfect starting point for a functional desk.
2. Desk Organization Step 2: Sort and “Zone” Your Workspace
With the excess clutter gone, it’s easier to organize what’s left. I like to sort my desk items into categories and create “zones” for different activities. This is a game-changer for maintaining a functional desk layout. For example, I have a computer zone (just my laptop and charger) and a writing zone (notebook, planner, pens). By dividing my desk into zones, I ensure that each item I keep has a logical place and purpose.
This simple system is one of the best desk organization strategies because it makes resetting your workspace at the end of the day almost effortless.
Here’s how I do it:
- Group similar items together: Group supplies neatly with these pen cups and desktop trays – a must-have for maintaining a tidy desk.
- Prioritize daily essentials: The things I use every single day stay within arm’s reach in the main desk area. Items I use less often get stored a bit further away (in a drawer or on a shelf). For instance, my stapler and paper clips sit in a mini tray on the side, whereas my external hard drive (used rarely) lives in a drawer.
- Create dedicated zones: If you both study and do crafts at the same desk, try defining a study zone vs. a crafting zone. In my case, I keep a clear area to jot down ideas on paper, separate from where my laptop sits. This little separation mentally prepares me for different tasks and prevents everything from bleeding into one messy pile.

By sorting and zoning, you’re giving everything a “home” on your desk. No more random mix of papers, snacks, and gadgets all fighting for space. Now, when I finish a task, it’s easy to put things back where they belong because each zone is clearly defined. This step made my desk feel twice as organized, and it barely cost a thing.
3. Maximize Vertical Desk Organization with Smart Storage Solutions
When desktop space is limited (and let’s face it, it usually is), look up! Using vertical space was a breakthrough realization for me. I used to spread everything across my desk, which quickly turned into clutter chaos. Now I store upwards instead of outwards, and it’s a total game-changer for desk organization.
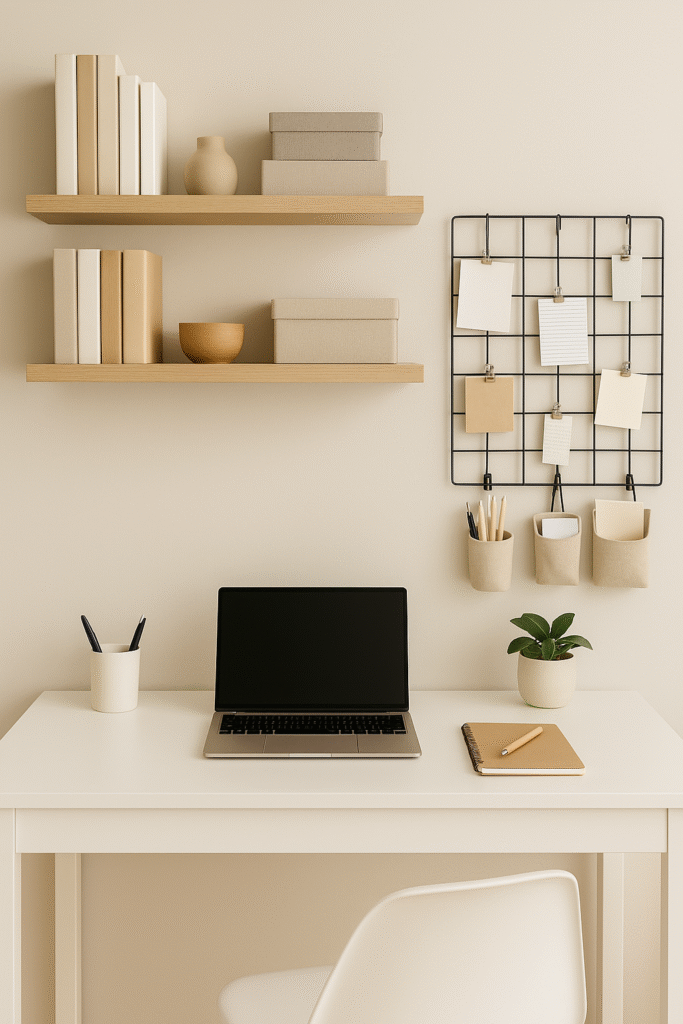
Consider adding shelves or wall organizers above or near your desk. I installed a simple floating shelf right above my desk, and suddenly all my books and decor items had a spot off the desk. You can also mount a wall file organizer or pegboard for papers and supplies. For example, my wall file holds important documents and mail, freeing my desktop of paper piles. Wall grids or pegboards can hold clip-on baskets, pen cups, or even a calendar. It not only clears your desk surface but also creates an eye-catching “command center” on the wall.
Another vertical trick I love is using a desk hutch or monitor riser with shelves. Placing a small desktop shelf unit on the back of your desk gives you tiers of storage: I stash my stapler, journals, and even a couple of cute plant pots up there rather than spread out across the desk. A monitor riser doubles as storage too – I slide my keyboard or notebooks underneath it when I need extra workspace. It raises my screen to eye level and carves out a new space below.
Don’t forget corners and sides: I’ve hung hooks on the side of my desk for headphones and tote bags, and even attached a little hanging cup for pens on the desk’s side. It’s all about thinking vertically and creatively. By utilizing the wall and vertical space, my small desk now holds twice as much without feeling cluttered.
4. Optimize Your Desk Organization Setup (Monitor, Lighting, & Layout)
An organized desk should also be a functional desk – comfortable, efficient, and tailored to your needs. I learned that part of organization is setting up your workspace ergonomically and thoughtfully.
When I improved my layout, I realized how much of desk organization actually overlaps with creating a more ergonomic, comfortable environment. By elevating my screen and adding proper lighting, I was organizing not just my tools, but also my workflow.
- Elevate your screen: As mentioned, a monitor stand or riser lifts your monitor (or laptop) to eye level and frees space beneath it. Once I added a monitor riser, I could stash my diary and keyboard underneath when not in use, instantly decluttering my desktop. Plus, no more neck strain from looking down at the screen.
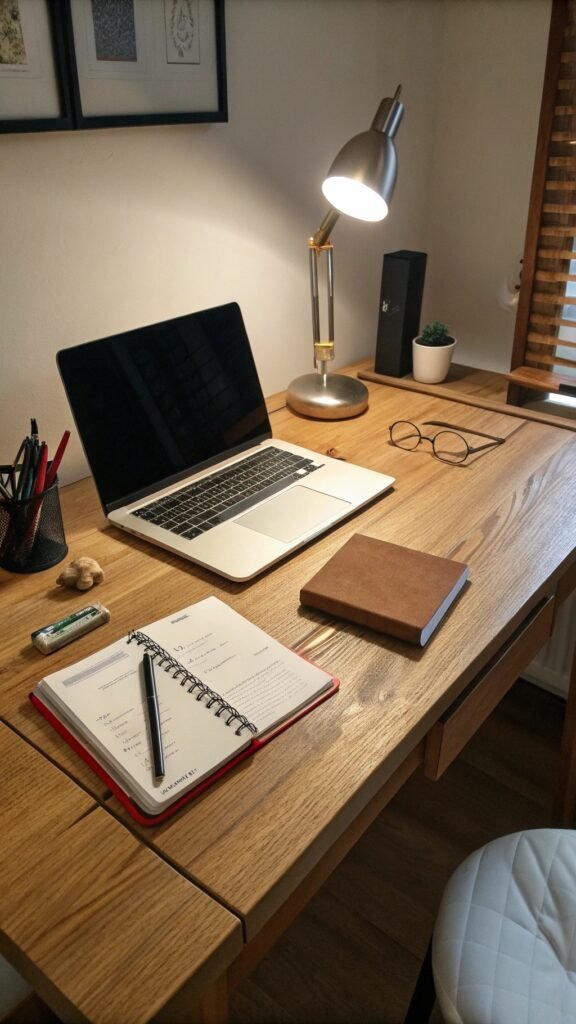
- Proper lighting without clutter: I had a chunky desk lamp that ate up a ton of space. I swapped that out for this sleek clamp lamp that attaches to your desk and saves space. Wow – so much more room! You could also use a floor lamp or a wall-mounted lamp near your desk to keep the surface clear. Good lighting is essential, but it doesn’t have to hog your workspace. After I made this change, my desk felt larger and my late-night study sessions were easier on the eyes.
- Arrange for workflow: Place your most-used tools according to your dominant hand and workflow. I keep my pen cup on the right since I’m right-handed, and my notepad open on the left. Think about the flow of your tasks – if you often reference a notebook while on the computer, keep them side by side. If you use a tablet for notes, maybe a stand for it next to the monitor helps. Organizing your layout this way reduces the constant shuffling of items.
- Comfort counts: A good chair, proper posture, and even a wrist rest for your keyboard can all contribute to a cleaner, more focused mind. While not “desk organization” in the traditional sense, a comfortable setup means you’re less likely to fidget and scatter things around in frustration. For me, adding an ergonomic chair cushion and a footrest kept me happier (and tidier) at my desk because I wasn’t constantly adjusting everything to get comfortable.
By optimizing your desk setup, you’re ensuring your workspace works for you, not against you. A little planning in layout and equipment goes a long way. Now, my desk setup feels like a personalized cockpit – everything I need is within reach, well-placed, and my body feels good working there. An organized desk isn’t just about where things go, but also how your space functions as a whole.


5. Desk Organization for Supplies: Corral Your Stationery and Tools
If you’re anything like me, it’s the little things that tend to create big messes. Paper clips, pens, sticky notes, earbuds – they all seem to scatter and multiply if not contained. The key to taming this small-item chaos is to give every category of supplies its container or holder. This single tip elevated my desk organization to the next level.
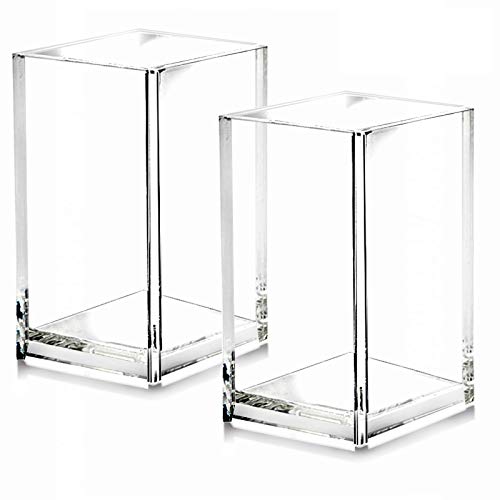
Desk organizers are your best friend here. I use a simple pen cup for pens and pencils (okay, it’s a cute floral mug – who says storage can’t be stylish?). A small desktop drawer unit or a set of trays is fantastic for containing those tiny items. For instance, I have a shallow tray where I drop paper clips, push pins, and USB drives – so they’re always in one place instead of roaming around my desk.
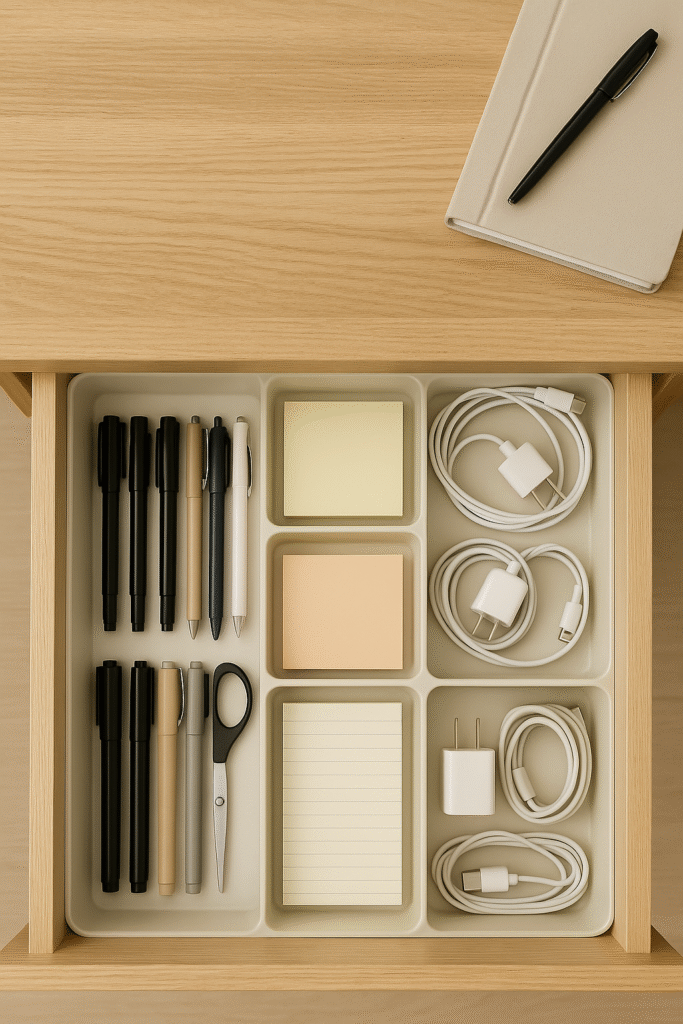
Tame the drawer chaos with adjustable drawer dividers that keep everything in its place. Once I added adjustable dividers inside my desk drawer, it stopped being a junk drawer and became an organized supply chest. Now, when I open that drawer, I see a section for tech gadgets, a section for stationery, another for notebooks, etc. No more digging through a jumbled heap to find a highlighter. If your desk doesn’t have drawers, no worries – a desktop organizer with drawers or a rolling cart with bins can serve the same purpose [Amazon link: desk organizer drawers].
I also keep a small filing tray on one side of my desk for active papers. Rather than let documents scatter, they live in that tray until I file or toss them. It’s like an “inbox” for my desk that keeps paper piles under control.
The rule here is “a place for everything, and everything in its place.” By corralling like items together in containers, you prevent that random clutter spread. It’s so satisfying to know exactly where to grab a sticky note or charger when I need it. And as a bonus, you can pick organizers that match your style – whether it’s rose gold wire baskets, sleek white plastic trays, or rustic wooden boxes – to add personality to your desk while keeping it tidy.
6. Cable Management and Desk Organization for a Clutter-Free Look
Nothing ruins the look of a streamlined desk setup faster than a tangle of cords dangling everywhere. I used to have a full-on spaghetti mess of cables draped behind my desk – it collected dust bunnies and made it hard to plug or unplug anything. Wrangling my wires was one of the most impactful desk organization moves I made, both for cleanliness and aesthetics.
Cable management might sound technical, but it’s actually simple and affordable. First, I gathered all those loose cords (phone charger, laptop cable, lamp wire, etc.) and sorted them. Then, I used a few inexpensive tools to tame them:
- Cable clips: These little stick-on clips are magic. I attached a few to the back edge of my desk to guide cables along a path, so they don’t dangle or fall to the floor. Now, my charging cable stays put within reach and doesn’t slip down every time I unplug my phone.
- Cable sleeves or ties: For grouping multiple cords together, I either zip-tie them or use a flexible cable sleeve. This bundles cords into one neat line. Under my desk, I have the monitor, speaker, and lamp cords all snuggled together in one sleeve – no more wild tentacles.
- Cable management box: Hide messy cords inside a cable management box for a polished desk look. This is a box that hides your power strip and the excess length of cables. All the adapter bricks and extra cord length are hidden inside, and only a single cable runs from the box to the wall outlet. It’s like a little home for the cable chaos, out of sight.
After implementing these, the difference was night and day. Not only does my desk look much cleaner (no more wire jungle), but it’s also safer and easier to clean around. Bonus tip: Go wireless with this mouse and keyboard combo for fewer cords and a cleaner setup. A charging station for your phone and gadgets can consolidate multiple chargers into one sleek stand. I love my 3-in-1 charging stand; it reduced three separate cords down to one.
Trust me, dealing with the cables is worth it. It gives your desk that polished, intentional look, as if a professional organizer set up your tech. No more snagging your foot on a loose cord or playing tug-of-war with a charger – everything is neat, tidy, and out of the way.


7. Make the Most of Small Desks (Student Desk Tips)
Organizing a small desk or a student desk can be challenging – you’re often dealing with limited space, no drawers, and multi-purpose use (one day it’s for homework, next day it’s your vanity or gaming station!). I’ve lived through the tiny dorm desk experience, so I know the struggle. The good news is, the principles of desk organization still apply; you just have to be even more creative with space.
Go vertical and modular: In tight quarters, vertical storage is your best friend (remember Tip 3!). Use wall shelves, command hooks, or stick-on pockets on the wall or inside closet doors near your desk. In college, I hung a pocket organizer on the wall to hold my calculator, flashcards, and even snacks. It kept my desktop clear for actual studying. Also consider a pegboard or grid above a small desk – you can rearrange shelves and cups on it as your needs change. It’s customizable.
Use multi-functional pieces: When space is limited, every item on your desk should work overtime. For example, a desk lamp with built-in pen holders or USB ports gives you lighting plus storage/charging in one. An Ottoman or stool with storage can double as seating and a place to stash books or cables. I once used a slim rolling cart as a “desk extension” – it tucked under the desk when not needed, and I’d pull it out while working to hold extra books or my cup of coffee. Look for items that fold, collapse, or serve more than one purpose to maximize a small desk area.
Keep it mobile: Expand your workspace with a slim rolling cart for desk storage – perfect for dorms and small rooms, as it can hold textbooks, printers, or craft supplies. When you need more room, you can wheel it aside. I had a lightweight caddy for my art supplies that I’d pull out only when I was doing projects, then stow in a corner. This way, the desk itself stayed clear for everyday use.
Minimize and prioritize: In a small or student desk scenario, you simply can’t keep everything out – and that’s okay. Embrace minimalism for your desktop: maybe your laptop, one notebook, and a pen cup are all that live on top. Keep other materials in bins under the bed or on a bookshelf and rotate as needed. During finals week, I’d only allow course-related items on my desk and nothing else. It really helped me focus. Also, utilize digital options to cut down physical clutter: scan important notes or use a tablet for PDFs instead of keeping stacks of papers.
The key is to adapt the organization to your lifestyle. If you also do makeup at your desk, designate a small basket for cosmetics that can be pulled out and then put away. If your desk is also your dining table (studio apartment life!), have placemats and a routine to clear it off before meals. It might sound like extra work, but these habits ensure your desk doesn’t become a perpetual dumping ground.
With these strategies, even a tiny student desk can feel surprisingly functional. I’ve managed to turn pint-sized workspaces into productivity hubs by using every inch wisely. Remember: small desk organization is about smart choices. It teaches you to be deliberate with what you keep out and where everything goes. Master that, and you can make any little desk feel like a big deal.
8. Add Personality with Functional Décor
Just because your desk is organized doesn’t mean it has to be sterile and boring. In fact, adding a bit of you to the workspace can make it more inviting – as long as you do it thoughtfully.
Adding stylish storage boxes, a plant, or a functional lamp not only looks nice but also contributes to desk organization because every piece doubles as storage or utility.
- Incorporate color and style in organizers: Upgrade your vibe with stylish pen holders, trays, and desk accessories
. If you adore a chic, feminine look, maybe go for a gold wire file tray or pastel pen holders. Love a clean, modern feel? Try white or acrylic organizers that blend in. I swapped out a plain pen cup for a cute rose-gold one, and it instantly made my desk feel happier – and it’s still holding pens, not random knick-knacks. - Decorate with useful items: Bring life to your space with these low-maintenance faux desk plants. If you prefer a real plant or a succulent, they add life to your desk and don’t create clutter (bonus: plants can purify air and boost mood). A decorative lamp, an inspirational quote in a nice frame, or a beautiful wall calendar can all serve a function (lighting, time management) and look good doing it. I have a corkboard on the wall where I pin photos and motivational quotes; it’s my décor plus a note-taking space in one.
- Use pretty storage: Hide clutter in chic decorative storage boxes that double as décor. I have a floral-patterned box where I store my charging cables and external drives – it looks like decor on the shelf, but inside it’s pure organization. Similarly, stylish bookends, magazine holders, or even a nice tray can elevate the aesthetic while corralling items.
One analogy I like: decorate your desk the way you’d frost a cake – thoughtfully and not too thick. A little goes a long way. One or two personal items can warm up the space (I keep a fun mug from a friend on my shelf and a photo of my dog on the desk). They make me smile during work. But I avoid overloading with plushies or excessive figurines that would just gather dust and get in my way.
By choosing functional décor, your desk remains organized and uniquely yours. The goal is that every time you sit down, you feel comfortable and inspired, not distracted by clutter. When I added these personal touches, I found I wanted to keep my desk clean – because it looks so pretty when it’s tidy! In a sense, making your desk reflect your style can motivate you to maintain its organization. So go ahead, put a bit of personality into it, just do so strategically.


9. Maintain Your Organized Desk Daily
Now that your desk is gloriously organized, the final (and perhaps most crucial) step is keeping it that way. I’ll be honest, I have to work at this. But I’ve learned some simple habits that help me maintain my desk organization with minimal effort.
The truth is, successful desk organization isn’t about doing it once – it’s about building routines that keep your space clutter-free day after day.
Here’s what I do:
- End-of-day reset: Every evening (or at least every Friday before the weekend), I take 5 minutes to put everything back in its place. It’s literally a five-minute sweep: pens back in the cup, papers into the tray or file cabinet, dishes to the kitchen, and throw away any trash. This tiny habit prevents mess from snowballing. I love waking up to a clean desk each morning – it’s so much easier to start work fresh.
- One in, one out: I try not to let new items linger without a home. If I bring in a new pack of pens or a gadget, I immediately decide where it will live (and if that means removing something old). By adopting a “one in, one out” mindset for supplies, I avoid drawers overflowing with redundant stuff. For example, when I got a new set of highlighters, I tossed the dried-out ones at the same time.
- Weekly wipe-down: Organized or not, desks get dusty! Once a week, I gently dust and wipe my desk surface and keyboard. It’s much easier to do when the surface is clear, and it keeps my workspace feeling fresh. I use this time to also peek in drawers and make sure nothing’s out of order. It’s a quick check-in with my system.
- Reassess periodically: Every few months, I’ll evaluate my setup. Maybe that file tray is getting full – time to archive old papers. Or perhaps I’m not really using that XYZ gadget on my desk – time to store it away. Our needs can change each season (back-to-school, end of quarter, etc.), so I adjust my desk organization accordingly. It’s normal for systems to evolve.
The goal is to prevent clutter from creeping back. By building these small habits, maintaining an organized desk becomes second nature. I find that when I keep up with it, it actually stays neat most of the time, and I rarely have to do a huge re-org anymore. Plus, the mental boost of sitting down to a tidy, welcoming desk each day is enormous – it’s like the desk is inviting me to be productive.
Remember, consistency is key. Even if you skip a day or things get a bit messy (life happens!), just reset and start fresh. I sometimes have crazy days where papers fly everywhere; the difference now is I know how to whip it back into shape quickly. And trust me, the more you stick with these habits, the easier they get. In the end, maintaining your organized desk will feel as routine as brushing your teeth – and your future self will thank you every time you sit down to work in a space that’s organized, clean, and ready to go.
Congratulations – your desk is now an organizational masterpiece! 🎉 With these strategies, I transformed my own workspace from a source of stress into a personal haven of productivity. Desk organization isn’t a one-time project; it’s a lifestyle tweak that pays off every single day. You’ll notice you can find things faster, focus better, and even feel calmer at your desk. And when life gets hectic, you now have the tools to rein in the chaos before it takes over again.
Go ahead and enjoy your newly organized, functional desk. Whether you’re powering through work tasks, studying for classes, or pursuing a creative hobby, your workspace is set up to support you. I hope these tips help you love your desk as much as I love mine now. Happy organizing, and remember – a little effort to tidy up each day keeps the clutter gremlins away!
FAQ: Desk Organization
Q: How do I organize a desk without drawers?
A: No drawers? No problem! Use desktop organizers like letter trays, pen cups, and mini drawer units that sit on top of your desk to hold papers and supplies. Wall-mounted solutions are a lifesaver, too – try a hanging file organizer on the wall or stick a pegboard above the desk to store items vertically. You can also utilize a small rolling cart or storage ottoman beside the desk for extra stash space. The key is to create designated spots for everything (even without drawers). For example, keep pens in a cup, papers in a magazine file, and use boxes or baskets for odds and ends. With a bit of creativity, you won’t even miss the drawers!
Q: What are the best desk accessories to keep things organized?
A: Some must-have desk organization accessories that I swear by include: a monitor riser (frees up space under your screen), a desk tray or letter sorter (to neatly stack incoming papers or mail), a pen holder or cup (so writing tools aren’t scattered), and drawer dividers (to keep any drawer contents tidy). Also, cable management tools like cable clips or a cable box make a huge difference in keeping the area wire-free. Depending on your needs, you might add a file organizer, a sticky note dispenser, or an under-desk headphone hook. Start with the basics: something to contain papers, something for pens, and something for cables – then add on organizers that fit your specific items (art supplies, charging station, etc.). These accessories turn chaos into order on your desk.
Q: How can I keep my desk organized every day?
A: The secret to an always-tidy desk is building a simple daily routine. Try to do a quick 5-minute clean-up at the end of each day: put pens back in the holder, toss trash, file away or at least stack papers neatly. This prevents clutter from accumulating. Also, practice the rule of “one in, one out” – if you bring a new item to your desk (say, a new notebook or gadget), remove something old or find a dedicated spot for the new item immediately. Regularly declutter your space each week by removing anything you don’t need. By consistently resetting your workspace, you’ll train yourself to naturally keep things in their place. Over time, you’ll find that your desk stays pretty organized as you go, with only a tiny effort to maintain it, because everything has a home.
Q: How do I decorate my desk without causing clutter?
A: The key is to choose decor that’s both minimal and functional. Opt for a few statement pieces that reflect your personality but also serve a purpose. For example, use a stylish lamp, a beautiful pen cup, or a designer magazine file – they elevate the look and double as useful items. Contain and rotate your decor: maybe a nice box that holds your keepsakes can sit on the desk so it looks neat. By curating your decor and giving each piece a purpose or specific spot, you keep the aesthetic vibe without the extra mess.
Lisa