Struggling with cluttered cabinets? Discover how to organize your kitchen cabinets with my step-by-step process and expert storage tips. I’ll share real-life examples, practical advice, and favorite tools to help you transform your cabinets into an organized, stress-free space. As a busy mom and homeowner, I know the frustration of digging through messy kitchen cabinets every day. But even a beautiful kitchen can become chaotic if it’s not organized effectively. Clutter isn’t just an eyesore – it’s stressful and time-wasting. One recent survey found that more than half of the people said an organized kitchen reduces stress. And did you know the average American spends 55 minutes a day looking for things they own but can’t find? I certainly don’t have that kind of time to waste, and I’m guessing you don’t either.
Organizing kitchen cabinets effectively has made cooking and cleaning so much easier for me. In this post, I’ll walk you through my approach to cabinet and drawer organization. These are tried-and-true steps I use in my own home, and you can follow along to tame the chaos in yours. Let’s get started on how to organize kitchen cabinets the easy way!
As an Amazon Associate, I earn from qualifying purchases. This website is a participant in the Amazon Services LLC Associates Program, an affiliate advertising program designed to provide a means for sites to earn advertising fees by advertising and linking to Amazon.com and other affiliate links
Why Organized Kitchen Cabinets Make a Difference
Before diving into the how-to, let me quickly share why a tidy cabinet matters so much. An organized kitchen isn’t just about aesthetics – it’s about peace of mind and saving time. When my cabinets are neat, I can grab what I need without rummaging around, which makes cooking dinner far less stressful. (It also means family members can find the snacks without asking me!)
To give a real-world example, I created a dedicated coffee cabinet in my kitchen. Every morning, I know exactly where to find the coffee, filters, and mugs. This simple setup saves me from the bleary-eyed scavenger hunt I used to perform at 6 AM. It’s like having a mini café station at home. The whole kitchen runs smoother when everything has a place.
There’s also a practical reason to declutter and organize: it can save you housework and hassle. Getting rid of clutter can eliminate up to 40% of housework in the average home – imagine cleaning 40% less often just by keeping things organized! Plus, when your cabinets are arranged logically, you won’t end up buying duplicates of items you already have (ask me about the three nearly identical can openers I donated after my last cabinet clean-out).
In short, an organized cabinet means less daily stress, less time wasted, and a more efficient kitchen. Now, let’s move on to the step-by-step of where to put stuff in kitchen cabinets and how to get them orderly.
Step 1: Empty and Declutter Your Cabinets
The first thing I do when organizing any cabinet is empty it out completely. Yes, everything comes out onto the counter or table. It might look like a disaster zone at first, but trust me – this is a crucial step. When I emptied my cabinets, I was shocked at how many unused gadgets and expired pantry items were hiding in the back.
Once everything is out, I sort through it ruthlessly. I make a donate pile for items that are in good shape but not used (that fondue pot I haven’t touched in five years went straight to donation). I toss anything broken, expired, or useless. Be ruthless here – remember, 80% of what we keep we never actually use. The goal is to only put back the things you truly need and love.
With cabinets empty, it’s the perfect time to give them a good cleaning. I wipe down all the shelves and the inside of the doors with a gentle cleaner. If you’re like me, you’ll probably find some crumbs or sticky spots you never noticed before. Cleaning your cabinet surfaces now means you’re starting fresh.
(Quick tip:) Consider adding shelf liners after cleaning. I use simple non-slip liners in my cabinets and drawers to protect the surfaces and make cleaning spills easier. It’s an extra little step that keeps your cabinets looking pristine, especially under the sink or where you store oils and spices.
By the end of Step 1, you should have purged the excess and be looking at a blank slate (empty cabinets) plus categorized piles of the items you’re keeping. Take a moment to appreciate the new space you’ve freed up – it’s going to make the next steps much easier!
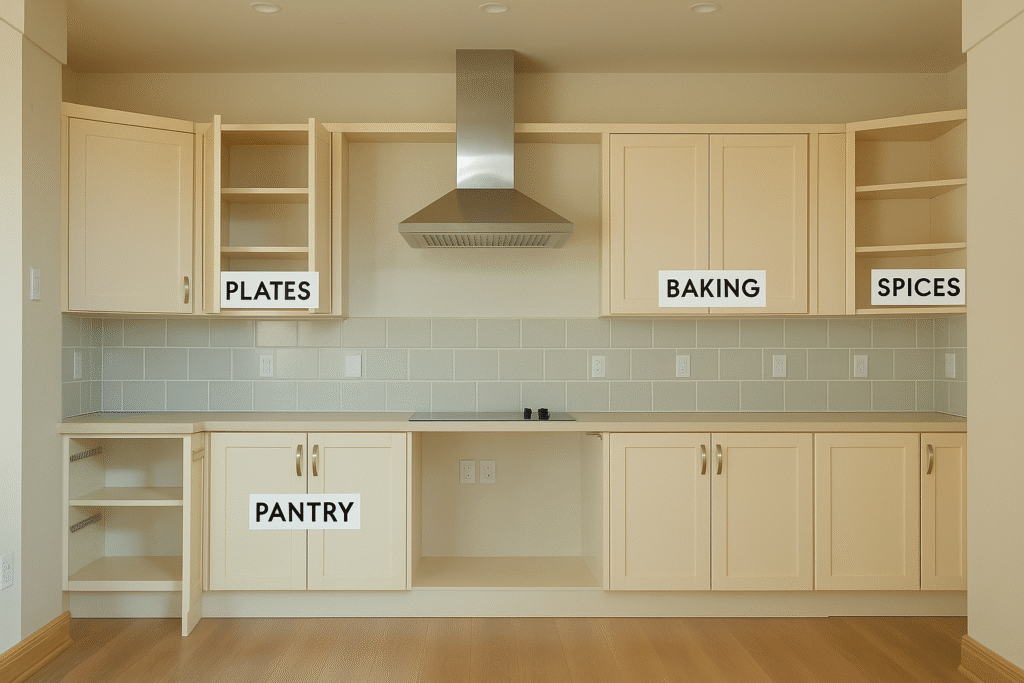
Step 2: Group Like Items and Plan “Zones”
With your keepers sorted out, the next step is to group similar items and plan where each group will live. I call these my kitchen “zones,” and it’s a game-changer for deciding where to put things in kitchen cabinets efficiently.
Start by grouping items by category or use. For example, put all your baking supplies in one group, cookware in another, everyday dishes in another, and so on. When I did this, I suddenly realized I had seven cutting boards (oops!). Grouping showed me I could pare down a bit more, and it also highlighted how I use my kitchen.
Now, think about your daily routines and designate zones for each group of items based on where you’ll use them. This is where the real strategy comes in for organizing kitchen cabinets effectively. Here’s how I map out my kitchen zones:
- Everyday Dishes & Glasses: I keep plates, bowls, and drinking glasses in the cabinet right next to my dishwasher. This makes unloading clean dishes a breeze. If you don’t have a dishwasher, store them near the sink. The idea is to have dishes that you naturally reach for when setting the table or putting things away. (Where to store dishes in the kitchen? Near the sink or dishwasher is usually best!)
- Coffee & Mugs: All my coffee mugs and coffee supplies are together in a small cabinet above my coffee maker. This way, my morning coffee routine happens all in one place. No more trekking across the kitchen to find a mug.
- Pots, Pans & Cooking Utensils: I store pots and pans in the lower cabinet right beside my stove. The cooking utensils (spatulas, ladles, etc.) live in the top drawer next to the stove. This way, when I’m cooking, I can grab everything I need without stepping away from the stove. It’s like creating a little “cooking zone” for myself.
- Baking Supplies: I have all my baking pans, muffin tins, and mixing bowls in a cabinet near the oven. I don’t bake every day, so these can be a bit farther from my main prep area, but when I do bake, they’re right by the oven, ready to go.
- Food Storage Containers: Those ever-toppling plastic containers and lids are in a cabinet near the refrigerator. This makes sense because I pack leftovers after dinner, and I can just turn around, grab a container from that cabinet, and pop the food into the fridge. (I also corral the container lids in a basket so they don’t avalanche out.)
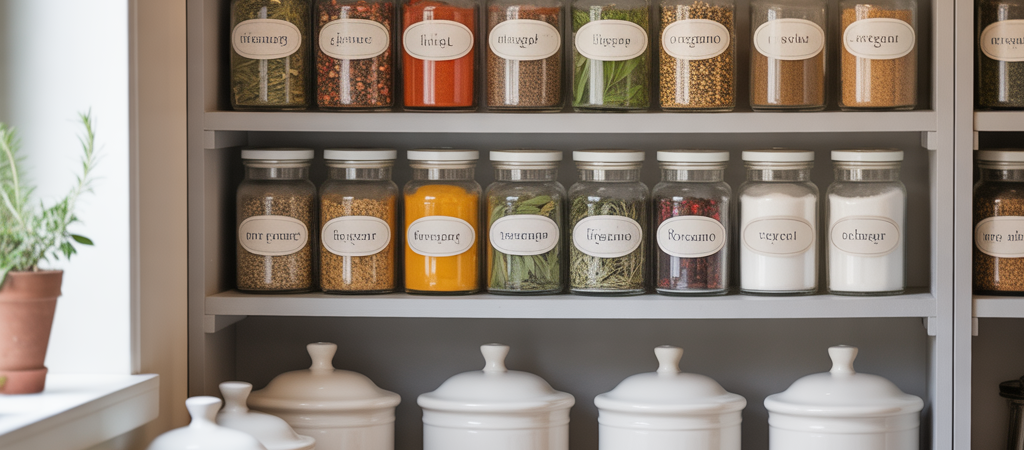
- Spices & Oils: I set up one narrow cabinet as my spice rack near the stove, since I reach for spices every time I cook. I keep cooking oils and sprays on a small tray on the bottom shelf of that same cabinet to catch any drips. This is my little flavor station.
- Cleaning Supplies: Most of my cleaning supplies are stored under the kitchen sink (like dish soap, cleaners, extra sponges), since that area is away from food and naturally the cleaning zone. Just be sure to use a plastic bin or tray under the sink to protect against leaks, and keep chemicals away from kids and pets.
These are just examples from my kitchen, but the core idea is universal: store items next to where you use them. If you’re wondering where to put things in kitchen cabinets, the answer is almost always “near its point of use.” Think about how a restaurant kitchen has stations for prep, cooking, and plating. In your home kitchen, you can create a mini zone for beverages, a zone for cooking, one for baking, etc. This way, you won’t be dancing all over the kitchen to find things – everything for a task is right where you need it.
Also, consider frequency of use. Keep the everyday stuff in the most accessible spots (eye-level shelves or front of cabinets). Put rarely used or seasonal items up on the highest shelves or in the back of a deep cabinet. I stash holiday-themed dishes and the turkey carving platter on the top shelf of a cabinet since I only need them once or twice a year. Professional organizers agree with this approach – for instance, experts recommend storing infrequently used serveware in harder-to-reach areas, reserving easy-access space for items you use daily.
At this stage, I usually sketch a quick plan on paper or just mentally assign each group to a cabinet or drawer. If you have a large kitchen with tons of storage, lucky you! You can spread out and maybe dedicate a whole cabinet to a single category (like all baking tools together). Just be careful not to let space become an excuse to hoard stuff you don’t need. If you have a small kitchen, don’t worry – the same principles apply, you just have to be a bit more creative (I’ll touch on small kitchen tips later).
By grouping and zoning, you’ve essentially answered the big question: kitchen cabinets – where to put things? Now it’s time to place everything back neatly and efficiently, often with a little help from some clever organizing tools.
Kitchen Storage Tips and Clever Tools to Maximize Space
Organizing is so much easier (and more fun, honestly) when you have the right tools. Over the years, I’ve tried a bunch of kitchen organization tools that truly make a difference in how much I can fit into my cabinets and how tidy everything stays. Here are some of my favorite kitchen storage tips and gadgets:
- Shelf Risers: These are small shelves that stack inside a cabinet to double your space. I use metal shelf risers in my cabinet for dishes – my dinner plates sit under the riser, and salad plates plus bowls sit on top. It’s like instantly adding another shelf without any installation. If you have tall shelf space being underutilized, shelf risers are a must. (I also put one in my pantry cabinet to organize canned goods on two levels.)
- Pull-Out Cabinet Organizers: For deep lower cabinets, consider adding pull-out drawers or sliding baskets. I added a pull-out wire basket in the cabinet under my sink, and it made accessing the back so much easier – no more getting on my hands and knees to reach the dish soap. Pull-out organizers are fantastic for heavy pots or small appliances, too. They essentially turn a cabinet into a smooth-sliding drawer.
- Lazy Susans: I love lazy Susans for awkward spaces. I have a lazy Susan turntable in a corner cabinet where I store baking ingredients and snacks. With a quick spin, I can see and grab whatever’s hiding in the back. Lazy Susans are also great for organizing spices or vitamins in upper cabinets – nothing gets lost in the void. Plus, there’s something oddly satisfying about spinning it around like a prize wheel to find your peanut butter!
- Over-the-Door Rack: Don’t forget the back of your cabinet doors. You can hang an over-cabinet door organizer for things like cutting boards, pan lids, or cleaning supplies. I have a sturdy over-the-door rack on my pantry cabinet door that holds plastic wrap, foil, and zip-top bag boxes. It’s free extra space that would otherwise be unused. Just make sure to measure first so your cabinet door can still close with the rack hanging.
- Drawer Dividers: If your kitchen drawers are a jumbled mess, you need these in your life. Adjustable drawer dividers or utensil trays can separate tools so everything has a slot. I use bamboo dividers in my utensil drawer to keep spatulas, whisks, and ladles nicely separated. No more digging through a chaotic drawer for that one ice cream scoop – I know exactly which section it’s in.
- Pan and Lid Organizers: One of the best additions I made was a vertical pan organizer rack. It’s a simple rack where I can stand up my baking sheets, cutting boards, and pot lids like files in a folder. This turned a cluttered heap into an orderly file system in a lower cabinet. Grabbing a cookie sheet now doesn’t trigger a loud clang of pans (my ears and my family are grateful!).
- Above-Cabinet Storage: If there’s open space above your kitchen cabinets, don’t let it collect dust. I place a couple of stylish baskets over the kitchen cabinets to hold infrequently used items (like seasonal serveware and holiday baking pans). It’s a sneaky way to expand storage upward. Just be sure to keep it tidy and not overloaded, so it still looks neat and intentional.
- Hooks and Tension Rods: Utilize every bit of space creatively. I’ve mounted a small row of hooks under an upper cabinet to hang coffee mugs (it looks cute and frees up shelf space). I’ve also used inexpensive tension rods inside a cabinet to create upright sections for cutting boards and trays. Think outside the box – even a simple Command hook on the inside of a cabinet door can hold your measuring cups or oven mitts.


Using these kinds of tools is like giving your kitchen an upgrade without a renovation. They maximize every inch and keep things in their designated spots. Remember, kitchen cabinet and drawer organization isn’t one-size-fits-all, so choose the solutions that make sense for your stuff. For instance, if you have a lot of baking sheets, a tension rod divider or pan rack is gold. If you have dozens of spices, a tiered spice shelf or uniform spice jars with labels might be your thing.
(Analogy time:) I like to think of these organizers as “assistants” helping me keep order. Just as a good filing system helps in an office, these tools file away your kitchen items in an orderly fashion. You’ll be amazed at how much more storage fits in your cabinets when you use vertical space and compartments. It’s almost like adding square footage to your kitchen without expanding its size.
By the end of this step, you should be able to place all your grouped items back into cabinets, with the help of some strategic organizers. Everything will have a home – a place for everything and everything in its place, as the saying goes. Take a step back and admire your work – those neatly arranged shelves and drawers are incredibly satisfying to look at!
Maintain and Enjoy Your Organized Kitchen
Once your kitchen cabinets are organized, the goal is to keep them that way. I’ll be honest, life gets busy, and even the best system can fall into disarray if you’re not mindful. But with a few simple habits, you can maintain your newly organized cabinets with minimal effort:
- Put Things Back in the Right Spot: It sounds obvious, but it’s easy to fall back into tossing items anywhere. I make it a personal rule that if I take the blender out from the bottom shelf, it goes back to that same spot when I’m done. Encourage your family members to follow the “home for everything” rule too – label shelves or containers if that helps them remember.
- Regularly Edit Your Kitchen: Clutter has a sneaky way of creeping back. Every few months, do a quick sweep through your cabinets and drawers. I typically do this at the start of each season or before big holidays. Donate or toss any new clutter (that gadget you bought on impulse but never use, or those plastic containers missing lids). This prevents build-up and makes the next big organizing session much easier.
- Adjust as Needed: Your life can change, and so can your kitchen needs. For example, when I got into baking bread one winter, I dedicated more space to flours and tools near my mixer. When that phase passed, I readjusted. Don’t be afraid to tweak your zones or move things if you realize another setup would work better. The beauty of an organized system is that you can see everything, which makes rearranging simpler.
- Enjoy the Benefits: Finally, take time to enjoy your clutter-free kitchen! Cooking is genuinely more fun when you’re not fighting chaos at every turn. I find that I’m more motivated to meal prep and try new recipes now. Plus, cleaning up after dinner is faster since I know where everything goes. It’s a positive cycle – the more you enjoy your organized kitchen, the more you’ll want to keep it tidy.
Organizing your kitchen cabinets isn’t a one-time task; it’s a lifestyle tweak. But from my experience, it’s a small effort that pays off every single day. When I see my neatly lined-up spices or easily grab the right pan without a crash, I feel a little spark of joy (call me an organization nerd, I won’t mind!).
You’ve got this! Just start with one cabinet if it feels overwhelming, and you’ll build momentum. By following these steps – decluttering, zoning, and using smart storage tools – you’ll transform your cabinets and possibly even how you feel about your kitchen.
Happy organizing, and may your kitchen become the functional, calm heart of your home it’s meant to be.
FAQ
Q: Where should I store dishes and glasses in the kitchen?
A: Keep everyday dishes and glasses in a cabinet that’s close to your dishwasher or sink. This makes unloading the dishwasher quick and easy. For example, I store my plates and bowls in the cabinet immediately to the right of my dishwasher. If you don’t have a dishwasher, choose a cabinet near the sink or where you do food prep. The key is to have those frequently used items within arm’s reach of where you’ll use or clean them.
Q: How do I decide where to put things in my kitchen cabinets?
A: I decide placement based on how often I use an item and where I use it. Start by grouping similar things together (all baking items, all snacks, all pots and pans, etc.). Then assign each group a “home” near its point of use. For instance, store pots and pans by the stove, mugs by the coffee maker, and cleaning supplies under the sink. High-use items should go in easy-to-reach spots (eye-level shelves or front of cabinets), while rarely used items can go up high or in the back. This way, everything is handy when you need it.
Q: What are some tips for organizing a small kitchen with limited cabinet space?
A: In a small kitchen, maximize every inch of space. Use shelf risers to create extra shelves within cabinets and utilize cabinet doors with over-the-door organizers or hanging racks for cutting boards and spices. Go vertical by stacking or using wall space (e.g., wall-mounted pot racks or magnetic knife strips). Also, be extra ruthless with decluttering in a small kitchen – if you have duplicates or items you rarely use, consider storing them elsewhere or not at all. I once lived in an apartment with a tiny kitchen, and what helped me was using a rolling cart as extra “cabinet” space and sticking to the essentials. Remember that in small kitchens, organization and minimalism go hand-in-hand.
Q: Any advice for organizing a large kitchen?
A: A large kitchen can be a blessing (more space!) and a curse (more room to scatter things). My advice is to still set up defined zones so you don’t end up wandering around your big kitchen looking for items. avoid the temptation to spread out so much that you forget where things are. I suggest leaving some empty space if you don’t need to fill every cabinet – it’s okay to have a little breathing room. Also, consider adding more organizers (like extra drawer dividers or pull-out shelves) to avoid the “black hole” effect in those deep cabinets common in large kitchens. The principles of grouping and keeping items near where they’re used still apply, no matter the kitchen size.
Q: How can I keep my kitchen cabinets organized in the long run?
A: The maintenance is pretty simple if you build good habits. Put items back in their designated spot after each use – I even label certain shelves to help my family remember what goes where. Schedule a quick cabinet tidy-up every few months to catch any clutter creeping in. And stay flexible: if something isn’t working (say, you find yourself always moving a gadget from one cabinet to another), don’t hesitate to rearrange your system. Consistency is key, but so is adapting your organization to fit your life. Personally, I treat organizing as an ongoing process rather than a one-and-done project, and that mindset keeps my cabinets in shape year-round.
Lisa