Is your refrigerator a jumbled jungle of leftovers and mystery containers? I’ve been there – digging through shelves like an archaeologist searching for last week’s takeout. Not only is a messy fridge stressful, it also leads to wasted food (the average family of four wastes nearly $3,000 in uneaten food per year, according to epa.gov!). That eye-opening stat pushed me to rethink my own refrigerator organization. The good news is, a little fridge organization can save you money, time, and sanity. Whether you have a roomy French door fridge or a tiny dorm-sized cooler, the same genius tricks apply. Let me share 10 genius ways to organize your fridge that transformed my chaotic fridge into an orderly, efficient haven.
As an Amazon Associate, I earn from qualifying purchases. This website is a participant in the Amazon Services LLC Associates Program, an affiliate advertising program designed to provide a means for sites to earn advertising fees by advertising and linking to Amazon.com and other affiliate links
1. Clean Out & Start Fresh (Prep for Refrigerator Organization)
I learned the hard way that fridge organization must start with a clean slate. Now I always begin by emptying the fridge and tossing expired items. (Trust me, organizing around old spaghetti sauce spills is a lost cause!) If possible, time this right before your weekly grocery run, when the fridge is relatively empty. I take everything out, do a quick audit of what’s still good, and wipe down shelves and walls with a mild cleaner. It’s amazing how much easier organizing is once that “mystery sticky spot” is gone.
To keep it clean longer, I line my shelves and drawers. Refrigerator liners are a game-changer – I use washable fridge liner mats that catch spills and crumbs. If something leaks, I can simply pull out the liner and rinse it. This prep step makes the refrigerator organization process so much smoother. Plus, starting fresh gives you a clear view of what you have (and frees up space for the next steps). It’s like hitting the reset button on your fridge!
2. Toss the Packaging & Use Clear Bins
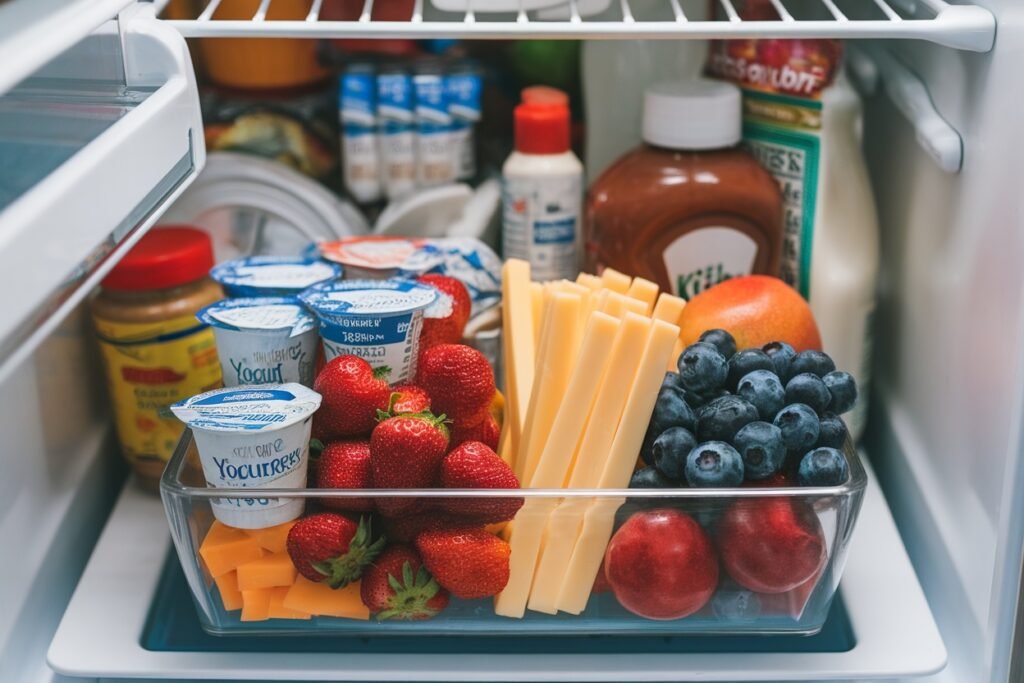
Ever bought a big multipack of yogurts or sodas and tried to jam the whole box in the fridge? I used to do that, and it wasted tons of space. Now I unbox everything I can. Cardboard packaging and plastic bags make your fridge look cluttered and hide what’s inside. I toss the bulky boxes and transfer items into clear bins. For example, juice boxes and yogurt cups go into a clear basket so they’re tidy and visible. Removing outer packaging instantly creates more room and a cleaner look.
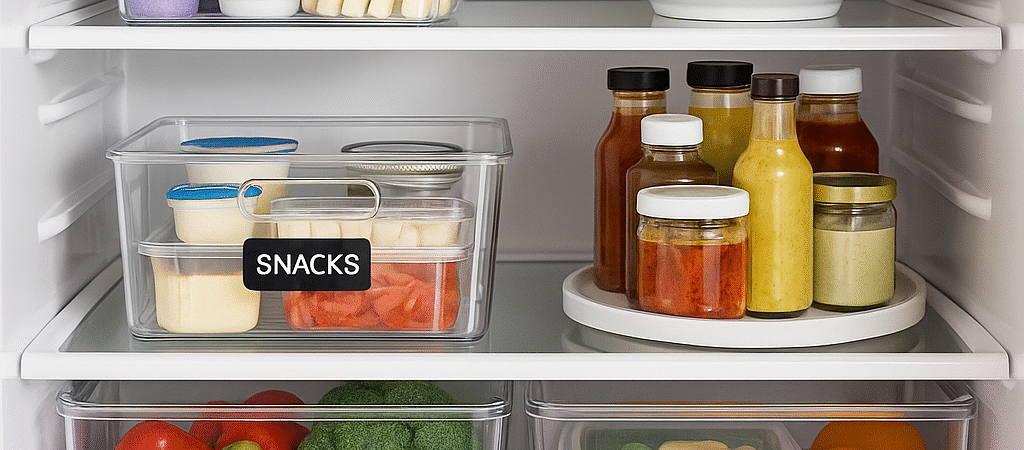
Using clear storage bins is my all-time favorite fridge organization hack. It’s so satisfying to group similar items together: I have one bin just for cheeses, another for deli meats, and a small one for all my kids’ snacks. When someone wants string cheese or a fruit cup, they can pull out the whole bin instead of rummaging through every shelf. The transparency is key – you can see exactly what’s inside each bin at a glance, which means no more food getting forgotten in the back. As a bonus, bins keep those little packets (like sauce packets or cheese sticks) from scattering everywhere. If you have a small fridge, small fridge organization is much easier with mini clear bins, corralling the chaos. This way, no space is wasted, and everything has a home.
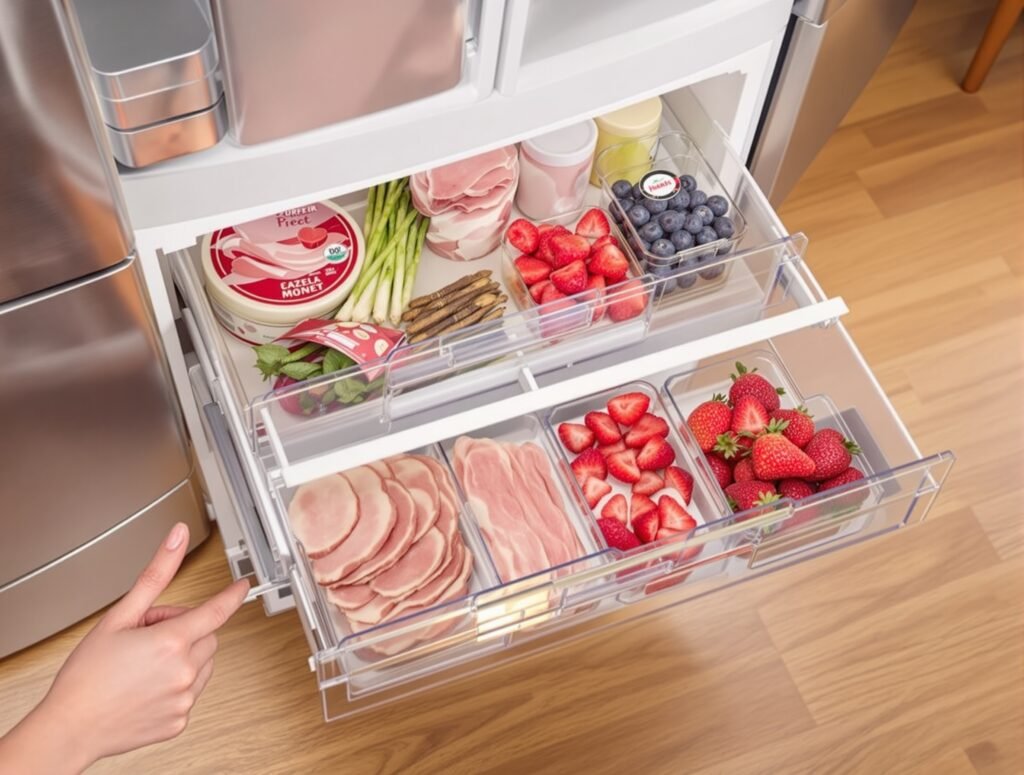
3. Add Pull-Out “Fridge Drawers” for Extra Space
One genius product I rave about is attachable fridge drawers. These are like mini pull-out drawers you can add to your existing fridge shelves. I slid a couple under my main shelves, and suddenly I had new compartments I never knew I needed! They’re perfect for small items like deli meats, cheese slices, or even pre-cut veggies. Instead of piling those things on a shelf, I stash them in a pull-out drawer bin. When I need something, I just slide the drawer out and everything is easily accessible..
This hack utilizes the often-wasted vertical space between shelves. If your fridge has tall gaps, these drawers fill that void and give you a second layer of storage. I found it especially helpful for small fridge organization in my sister’s tiny apartment: adding one or two slim drawers let her use every inch of space efficiently. It’s like creating a mini cabinet inside your fridge! As a bonus, most of these drawers are clear plastic, so you can see the contents and they slide out smoothly by the handle. Fridge drawers make staying organized effortless.
4. Go Vertical with Stackable Bins and Shelf Risers
When organizing my fridge, I started thinking up, not out. You can stack and elevate items to capitalize on the fridge’s height. One trick I use is stackable storage bins that come with lids. Another nifty item is a small shelf riser or mini rack that creates an extra tier on a tall shelf. I placed a riser on one half of a shelf, and now I can store shorter items underneath and set another small container on top. It essentially doubles the usable space for that section.
By stacking containers neatly, you fill the vertical gap that would otherwise be empty air. This is crucial for small fridges, where every inch counts. For instance, I use a stackable wine bottle holder that lets me securely stack wine or soda bottles in a horizontal row without them rolling around. Similarly, a dedicated soda can organizer allows cans to be stored in a tidy stack – you load them in and they roll forward for easy access (so you can actually have a 12-pack in a compact form!). No more random cans tumbling out when you open the door. By using tiered storage and stackable solutions, my fridge now holds way more than before, yet it feels organized and spacious. Vertical thinking = maximum fridge space unlocked!
5. Use Door and Wall Space (Even a Suction Cup Caddy)
Don’t forget about the fridge door and walls – they’re prime real estate for storage. The door already has shelves, so I designate each door shelf for a category (condiments on one, drinks on another, etc.). But the insides of the walls can be used too, especially in a larger fridge. I discovered you can stick suction-cup baskets on the smooth interior walls of your fridge. (Yes, the same type of little caddy you’d use in a shower!) I have a suction cup caddy on the side wall holding small snack packs and cheese sticks. It’s a genius way to add “floating” storage in an empty spot.
Another hack for fridge walls or ceilings is using magnetic containers if your fridge interior is metal. For example, I’ve seen magnetic spice tins and mini baskets that can cling to the side outside of the fridge or on the fridge door. I keep a small magnetic basket on the side of my refrigerator (on the outside) for storing medication that needs refrigeration – it’s easy to grab and doesn’t get lost among the food. Also, take a look at your fridge door arrangement: if the shelves are adjustable, move them to fit your items best (I lowered one shelf to fit tall bottles and raised another to snugly hold shorter sauce jars, so nothing gets hidden). Using a bit of creativity with door and wall space means even more storage capacity without cluttering the main shelves. Every nook can serve a purpose!
6. Spin in a Circle with a Lazy Susan
This hack literally had me saying, “Why didn’t I do this sooner?!” Placing a Lazy Susan turntable on a fridge shelf is a game-changer for accessing items. I use a Lazy Susan on the top shelf for all my jars, sauces, and other small containers that used to get lost in the back. Now, if I need the jam or soy sauce, I just spin the tray and it rotates everything into view. No more knocking over five things trying to reach one bottle!
It’s especially useful in deep fridges or on shelves you have to bend to see. I no longer have any “forgotten condiments” because one quick spin lets me see all the contents. In my experience, a 10-12 inch diameter turntable works well for most fridges – just ensure it fits on your shelf with the door closed. I’ve even seen people use two smaller Lazy Susans side by side on a long shelf for different item categories. This idea also works wonders for those awkward top corner spaces. Think of it as bringing the convenience of a corner cabinet carousel into your fridge. I love that I can just twirl and grab – it makes staying organized almost effortless. If you’re constantly finding old salsa jars hidden in the back, a Lazy Susan will be your new best friend.
7. Label Everything (Like a Grocery Store)
When I first organized my fridge, I felt proud… until my family ransacked it and nothing went back where it belonged. The fix? Labels! I started labeling the bins and shelves, and wow, what a difference. I put a label on the front of each bin: “Snacks,” “Dairy,” “Leftovers,” etc., so everyone knows what goes where. It’s a simple step, but it instantly makes your fridge feel professionally organized (ever notice how grocery stores have clear labeling for every section? It’s the same idea!). No more family members asking me, “Where does this go?” or sticking the salsa in the wrong spot. Now the labels do the talking.
You can use a label maker or just tape on cute chalkboard labels that are repositionable. I personally use removable white stickers with bold black marker writing. And don’t forget to label any opaque containers too – if you decant leftovers into a food storage container, slap a piece of masking tape on it and write what it is and the date. This isn’t just Type-A overkill; labels help prevent science experiments in the back of the fridge. When you see “Chicken curry – Monday” on a container, you know to eat it soon. I even label a basket “Eat Me First” (more on that in a moment). It might feel a bit extra, but having labels front and center makes finding things a breeze and keeps the whole household accountable to the organizing system. It’s like giving every item an address in your fridge!
8. Create Zones (Snack Zone = Sanity Saver)
Grouping similar items into “zones” has made my fridge incredibly intuitive to use. Think of your fridge in sections, each with a purpose. For example, I dedicated one bin as a Snack Zone for my kids. All the cheese sticks, fruit cups, and yogurt tubes live there. Now, when the kids are hungry, they (and I) know exactly where to look – and it keeps them from scattering snack items all over. You can do this for other categories, too. In my fridge, I have:
- A “Leftovers” zone – right at eye level in the front, so we remember to eat them.
- A “Breakfast” zone – where I keep butter, cream cheese, and jam together on one shelf near the bagels.
- A “Sandwich” zone – deli meats, sliced cheese, and condiments grouped in one area for easy lunch prep.
The idea is to store like items with like. Just as you’d organize a closet by pants, shirts, and shoes, your fridge can have zones for produce, drinks, proteins, snacks, etc. I even use a clear bin as a “prep zone” for meal prepping: if I chop veggies or marinate meat ahead of time, those containers go in one bin so I can pull them all out at once when it’s cooking time.
Zoning your refrigerator keeps it user-friendly. When everything has a designated spot, you’re less likely to lose track of items. This also ties back to labeling – I label the front of each zone/bin so it’s crystal clear. My Snack Zone bin actually says “SNACKS” in big letters, and oh boy, it has saved me so much time answering “Mom, where’s the pudding cups?” Now, even guests can open our fridge and figure out where things are at a glance. It’s that organized.
9. Add an “Eat Me First” Bin to Cut Waste
This tip alone has drastically reduced how much food goes to waste in my kitchen. I designated a small, clear bin as the “Eat Me First” bin. This bin is like a VIP section for foods that are about to expire or leftovers that need to be eaten soon. Whenever I have half an avocado, last night’s pasta, or yogurt nearing its expiration date, I pop it into the Eat Me First bin (which I keep front-and-center on a middle shelf). The rule is: whenever anyone opens the fridge looking for a snack or meal ingredient, check the Eat Me First bin first to see what needs using up.
That bin acts as a visual reminder: Eat this stuff before grabbing something else! I even put a bold “Eat Me First” label on it to draw attention. It almost becomes a game – how empty can we make this bin by the end of the week? Since starting this, we throw out far less food. (Remember that $3,000 of wasted food per family I mentioned? I feel so much better knowing we’re not part of that statistic now.) You can use any small bin or basket for this purpose – the key is placement and making it a household habit. This genius little fridge hack not only keeps your fridge organized by cycling items properly, but it also saves you money by ensuring foods get eaten in time. Win-win!
10. Do a Quick Weekly “Fridge Reset”
Even the best organizational systems need a refresh. I make it a point to do a quick fridge reset every week. Every Sunday night, I’ll scan each shelf and remove anything that’s past its prime or looking sad. I wipe up any little spills and re-group items that might have wandered out of place. This regular maintenance is so much easier than letting the fridge descend into chaos and doing a huge clean once in a blue moon.
One trick that helps me during these check-ups is keeping a dry-erase marker handy. I’ll mark leftover containers with the date or write a quick note on a magnetic whiteboard on the fridge door like “Eat leftover chili by Thursday!” This adds a visual cue for everyone. You could also keep a running inventory or grocery list on a small whiteboard on the door. I personally love opening my fridge on Monday knowing it’s clean, organized, and ready for the new groceries.
Wrapping Up: I hope you feel inspired and equipped to tackle your own fridge now. I can’t tell you how satisfying it is to transform that chaotic refrigerator into a neat, organized space where everything has its place. It genuinely makes cooking and meal time less stressful when I know exactly where to find things (and actually see what I have!). Remember, you don’t have to do it all at once – try implementing a few of these fridge organization hacks at a time. Maybe start with a good clean-out and a couple of clear bins, then add more organizers as you go.
By using these 10 genius tips – from clear bins and Lazy Susans to snack zones and “eat me first” reminders – my fridge went from disaster zone to a thing of beauty. Yours can too! And whether your refrigerator is a sprawling double-door or a compact apartment-size unit, the principles are the same: give everything a home, use your space creatively (think vertical and hidden spots), and maintain it with small habits. Now, when I open my fridge, I actually smile at how orderly it is (who knew a tidy fridge could spark joy?). You’ve got this – happy organizing, and enjoy the ease and peace of mind that comes with an organized fridge! 🥳🧊
Lisa